Are you struggling to install passenger foot pegs on your Harley-Davidson bike? Don’t worry, you’re in the right place. You’ll get all your answers here.
To install passenger foot pegs on a Harley-Davidson Softail, remove the factory-installed bolts from the mounting bracket. Attach the foot peg brackets using the provided bolts and secure them tightly. Ensure proper alignment and test for stability before riding.
In this guide, you’ll get to know all about how to install passenger foot pegs on Harley-Davidson Softail. Moreover, you’ll also get to know how to find out the best passenger foot peg option for your bike. So without further ado, let’s get on with the guide.
Passenger foot pegs – An important part of your Harley-Davidson bike
When riding a Harley-Davidson motorcycle, the rider and the passengers need to have something to rest their feet on. They normally place their feet on cylindrical rests called foot pegs. Meanwhile, the foot pegs for passengers are called the passenger foot pegs. Occasionally, you may notice that the passenger foot pegs on your bike are wearing out or broken. Then, you start pondering how to install passenger foot pegs on Harley-Davidson Softail.
In such cases, you will either need to get it repaired (if possible) or install new ones of the same brand. In most situations, Harley-Davidson bike owners prefer upgrading their passenger foot pegs with a new pair from a reputed brand.
How to install passenger foot pegs on Harley-Davidson Softail?
For installing passenger foot pegs on your Harley-Davidson motorcycle, you’ll first need to arrange a pair of high-quality foot pegs. Get the pegs, the mounting brackets, snap ring pliers, and the needed hardware (bolts, clevis pin, spring washers). Before beginning the installation process, you’ll need to remove the old passenger foot pegs from the bike. Make sure that you don’t lose the spring device or wave washer or the clevis pin.
Also, keep an eye on the model year of the Harley-Davidson foot controls. If you plan on re-using the stock pivot pins when installing the new foot pegs, you shouldn’t re-use the pins. Instead, throw them away and look for new ones. It is recommended that you should use the clevis pins. Here is how to install passenger foot pegs on Harley-Davidson Softail after removing the previous foot pegs.
- Start by locating the black plugs near the exhaust of your Harley-Davidson bike
- Loosen the exhaust at the flange and loosen the bracket as it’ll get in the way unless removed
- Remember to disconnect the oxygen when you’re removing the exhaust
- On the other side, remove the black plug and the bolt near the passenger foot peg
- On the right side, remove the black plug near the exhaust by using a knife. Create a gap using the knife before pulling it with your fingers. Repeat the same with the other black plug.
- Use the 5/16th inch hex bit socket and the mounting bracket and connect it at the location of the black plug you just removed. Make sure that the mounting bracket is facing upward and is at a 45-degree angle.
- Now remove the black plug from the left side of the bike using a knife. Create a gap using the knife before pulling it with your fingers. Remove the bolt near the foot peg area.
- Install the mounting bracket on this side by using the short bolt going in the bottom part of the left mounting bracket.
- There isn’t a lot of clearance to tighten the bolts properly. This is why you’ll have to loosen the exhaust at the flanges. This will require a half-inch socket with an extension. Loosen it from the bracket and the cover. Make sure that the oxygen sensor is unplugged.
- Removing the exhaust will give you access to the sprocket cover. This needs to be removed to be able to loosen up the mounting bracket. Unscrew the bolts and get the sprocket cover off.
- In the brackets, torque the bolts to 45-50 foot-lbs. To do that, grab your torque wrench, set it to 45-50 foot-lbs. Loosen up the bottom, adjust the handle, and use the markings to match up with a 0 marking after twisting the wrench left-right. You need to twist until you hear a click. For the first attempt, you’ll need to do it at 30 foot-lbs. Then, loosen the bottom, and adjust the bottom to get the result according to 45-50 foot-lbs. Working your way up would be better than directly jumping in to get 45-50 foot-lbs.
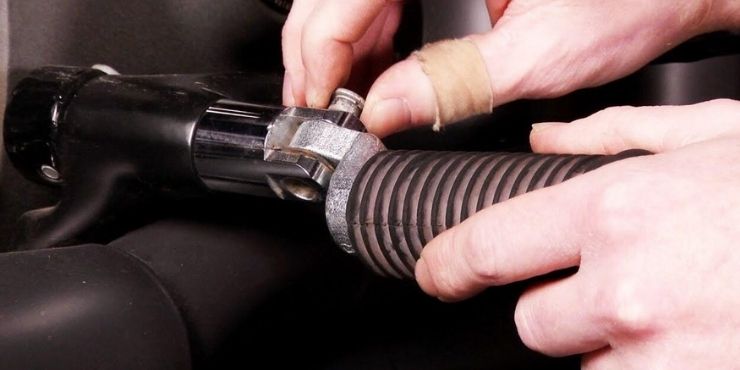
- Take the foot peg with the rounded part of the peg facing inward. Insert the rounded part of the foot peg and the spring washer in the mounting bracket’s cavity. Insert the clevis pin. The retainer piece will be used to shut everything in place. As the retainer piece features two tiny holes, so you’ll have to use a pair of snap pliers. Squeeze the retainer piece, push, and it’ll pop over, at which point you’ll need to squeeze it shut.
- Repeat the same for the passenger foot peg on the other side. Add the clevis pin, the passenger foot peg, and the spring washer. Shut them in place by using the retaining piece. Squeeze the retainer piece, push, and it’ll pop over, at which point you’ll need to squeeze it shut.
- You’ve successfully installed passenger foot pegs on your Harley-Davidson bike.
How to choose the right passenger foot peg option?
While you know how to install passenger foot pegs, you’ll still need to ensure you’re going for the right option. Every Harley-Davidson bike rider needs to thoroughly investigate the functions and benefits of different passenger foot peg options. Choosing the better option will result in better quality and improved performance. Here are some of the elements you need to consider when buying new foot pegs.
Search for a durable material
Passenger foot pegs are a commonly used component in a motorcycle. Both the driver and the passenger on the bike rest their feet on these foot pegs. It wouldn’t make sense to keep your feet in the air when riding your Harley-Davidson bike. Often, the rider and passenger may shift their position while moving their feet slightly. After a period of time, it starts resulting in friction and wear.
Fortunately for Harley-Davidson bike owners, these foot pegs come designed to withstand daily use. They’re made using high-quality material that is long-lasting and durable. For instance, some foot pegs are made up of billet aluminum and anodized for ensuring a tough exterior finish. Having high tensile strength in the passenger foot pegs will help ensure more durability and better performance.
Easy to install
Passenger foot pegs normally come with a reputation of being fairly easy to install. If the foot pegs in the bike attach with locking washers and bolts, they’ll be simple to install. Passenger foot pegs with rivets will be tougher to take off and put back on.

If you’re looking for foot pegs online, you must look for the ones that come with an installation guide or owner manual. This will make installation far easier. Moreover, double-check to ensure that the fasteners and other necessary parts are included in the passenger foot peg kit.
Consider the placement
Bikes that have single riders will not have enough room or need to install passenger foot pegs. There will be different kinds of foot pegs for single riding motorcycles. It is important to distinguish between the two types of foot pegs and choose the right one for your bike. Only go for the right passenger foot pegs for bikes that come with room for passengers.
Calculate the comfortable length
In certain cases, passenger foot pegs from the equipment manufacturer might not be adequate. It might be a little short or may be a bit uncomfortable. The passengers with wide or large feet often look for ample space on the foot pegs. Otherwise, it feels very uncomfortable, and it isn’t a fun experience riding a Harley-Davidson bike when you’re uncomfortable. If you’ve to travel longer distances with a passenger, ensure that you calculate the right length of the foot pegs. Having longer foot pegs will be comfortable for passengers.
Choose the right style
Some passenger foot pegs are basic black color, while others are chrome with black grip areas or metallic silver. Some models feature finishes like gold or bright red. If you’re buying passenger foot pegs, choose a pair whose style and finish match the style of your bike. Buying foot pegs that don’t match your bike’s style doesn’t make sense, as they’ll stick out like a sore thumb.
Why you may need to change the passenger foot pegs?
Aside from the stylistic factor, there are a few reasons why you may want to change the foot pegs. Although the reasons might differ from one rider to the other, there could be a combination of reasons as well. Some of those reasons include improving the control of the bike, improving the weight distribution, and improving comfort. The other reasons also include possible wear and tear or broken foot pegs.
If you have a lower foot peg, it’ll result in the passenger smacking their foot against rocks on the road. Meanwhile, a higher placement might mean their feet start feeling like a pretzel. It is important to have a clear plan in your head and change to the right foot peg option. Cramped legs, different foot sizes, lack of enough room to maneuver the body, and lack of balance are some of the common problems that arise due to the wrong placement of passenger foot pegs.
It’s essential to get the passenger foot pegs installed right; otherwise it’ll be a horrible experience for your passengers. The right position and height of passenger foot pegs will allow the passenger to move to a standing position faster. Moreover, you should also consider your own riding style into account, as the passenger’s safety is important as well.
Conclusion
Thank you for reading. Hopefully, now you know how to install passenger foot pegs on Harley-Davidson Softail. The process involves arranging the right tools and hardware and using the step-by-step instructions mentioned above to do the task. You’ll need to mount the brackets after removing the black plugs and insert the rounded side of the foot pegs. Use a clevis pin, a spring washer, and the foot peg and insert them into the mounting bracket. Use a retainer piece to shut them into place and install the foot peg.

