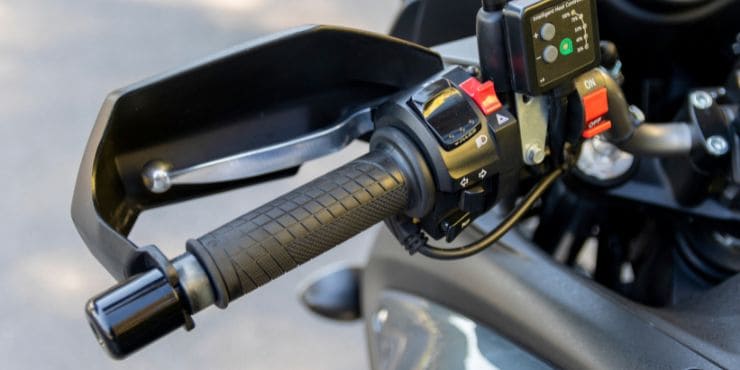
Are you a Harley-Davidson motorcycle owner struggling with changing hand grips on your motorcycle? If yes, then this blog is just the right place for you.
To change hand grips on a Harley, first, remove the end caps and loosen the clutch and throttle cables. Slide off the old grips, apply adhesive to the new grips, and slide them onto the handlebars. Tighten the cables and replace the end caps.
In this article, you will get to know all about hand grips on motorcycles, how to remove stock Harley-Davidson motorcycle grips, how to change hand grips on Harley-Davidson motorcycles, and more. Stick around to get all the answers that you are looking for.
Changing Hand Grips on your Motorcycle
If you own a motorcycle, you will inevitably have to change the hand grip on your motorcycle. If this is your first time changing the motorcycle hand grip, you’ll have many questions, like why motorcycle grips have different-sized holes for each side, how to remove the hand grip, how to change hand grips, and more.
The larger hole in the hand grip is for the right-hand side of your handlebar. It is slightly larger as it’ll slip over the throttle tube. The throttle tube rotates over the handlebar and will be larger in diameter than the handlebar itself. Meanwhile, the smaller hole will be for the left-hand side of your handlebars and slip over the handlebar.
Neither of the holes has specific measurements like 1”, 7/8”, etc. If they did, they’d simply slide off. The grips have to be a snug fit so that they stay where they belong – on your handlebars. The larger hole will go on the throttle tube, while the smaller hole will go on the left.
If you are looking to change your Harley-Davidson grips, then you are probably trying to solve one of the two issues. Either the existing grips are causing you hand problems, or you simply don’t like the look of what is currently present on your bike. The stock Harley-Davidson grips are great in both look and function, but they can still be upgraded. But you need to learn how to remove them first.

How to Remove Hand Grips on Harley-Davidson Motorcycles
For most Harley-Davidson motorcycles, removing the stock grips is a simple process. On the throttle side, you will likely have housing of sorts that you will need to remove, and then the grip would slide right off. It is possible that you might have a situation where there is a tube inside the throttle grip that has to be saved. If this is the case, it is usually done by splitting the grip with a sharp knife and peeling it away from the tube. For most aftermarket grips, you will find that they come with replacement tubes.
For some Harley-Davidson bikes, it can be as simple as removing two Torx screws in the housing before sliding the grip right off the bar. The first screw will sit at the top, toward the back of the housing.
Meanwhile, the second screw will be under the housing and toward the front. Once the screws are removed, the top of the housing will lift right off. You will want to carefully and lightly wiggle the bottom part of the housing so that you can get it to move down. There’s also wiring in here that you will want to protect, you remember to be gentle. Once both sides are removed, the throttle grip will slide right off.
Now, move to the clutch side. Chances are that the grip is only sitting inside the housing at the very end, but the housing doesn’t actually hold the grip in place. The grip will be secured by glue, which means that you will need to do some work to get this one removed.
The instructions provided with the hand grip will mention what you need for removing the grip. Regardless of the tools you choose, chances are that you will need to ruin the grip, so you should be prepared to trash it instead of adding it to the “back to stock” box.
How to Change Hand Grips on Harley-Davidson Motorcycles
Depending on the type of grip you’ve chosen, the installation process can be slightly different. Specifically, some throttle side grips could have a two-piece installation with a throttle tube and a grip that has to be slid over it. Some throttle grips come in a one-piece design. All you will need to do is ensure that the logo was in the right position and slide the grip into place.
Once the grip is in place, you should slide the lower housing back over the lip of the grip before installing the upper housing. Tighten the housing Torx screws to stock torque specifications and you will be done with your throttle side.
As for the clutch side, the grip installation will be a bit different. The grip will be held in place by two screws, which sit on the inside flare. You will want to position the grip before marking the bar by using a tap through the two screw holes. If you haven’t got a tap handy, you can use a thin drill bit to slightly scratch the bar.
You should then slide off the grip, and using a drill, you should make a divot into the bar at both of the marked locations. What you should be aiming for is a slight depression where the screw will be seated. You should ensure that you do this carefully, such that you don’t drill through the bar completely.
With the divots drilled, you should slide the grip back into place before securing it with the two included screws. Make use of a drop of medium thread locker like Loctite. For bikers not installing the specific grips or grips that are not secured by screws, you will need to use grip adhesive. You must follow the label instructions and then ensure that you let it cure before riding.
You could find that you will need to move your clutch housing to get it to fit the grip placement. Just like you did on the throttle side, you should loosen the screws and then slide the clutch housing into a position that’ll allow it to sit next to the grip r or allow the inner lip of the grip to sit just inside the housing if this is how the grips are designed.
Installing grips will be a quick and easy project if you know the right steps to take. With just a couple of tools required, most riders should be able to install it in less than an hour or so. The grips sold by Harley-Davidson are definitely great. Further, you can find the ones that suit you the best, such as a wide grip, grips of specific color, or more.
Alternative Methods to Install Motorcycle Grips
Method 1: Use spray paint inside the grip before sliding the grip on
There are different ways of installing your groups, although a common way would be to spray some hairspray, spray paint, or WD-40 inside the grip before sliding it on. While wet, it will help with sliding the grip on, and once it is dry, it will help keep the rubber grips from sliding off.
Start from the inside of the grip and spray thoroughly to the outside edge. The grip should slide on with ease and then as the WD-40 or spray paint dries, it will become sticky and keep the grip on for miles.
Method 2: Grip tape
Another alternate way would be to use adhesive-backed grip tape, like the one found on skateboards. Then, apply thin strips around the end of the handlebars.
It’ll be hard to slip the grips on with the grip tape in place, but it’ll keep the grips from working their way loose. It’ll be easiest to install hand grips with compressed air when using the grip tape method. Of course, the grips will not easily slide up over the grip tape.
Method 3: Use safety wire to secure rubber hand grips
A mechanical way that you can secure the rubber grips is by using a piece of safety wire around the outside of the grip’s end. Using safety wire pliers, you should twist the wire, tighten it tourniquet-style, and then compress your grip against the handlebar. This is a common practice on race bikes of all sorts.
Throttle Tubes in Harley-Davidson Bikes
Most motorcycle grips don’t actually include a throttle tube. The throttle tube will slide onto your handlebar and is what you need to twist, typically by pulling/pushing a cable. The recently released Harley-Davidson bikes operate using a small sensor switch, which turns when you twist the throttle, commonly known as “throttle by wire”.
Throttle tubes can be made using aluminum, such as the Biltwell Throttle Tube. However, there are other inexpensive but equally functional options available, like the Cycle Standard Throttle Tube, which is made up of durable plastic. Aluminum throttle tubes are unlikely to give you any issues, whereas a plastic throttle tube can crack where the cable engages, although this is by no means a common occurrence.
Brands like Harley-Davidson have the stock grip and throttle tube as one piece. In such cases, you might want to purchase a throttle tube if you are looking to install custom Harley-Davidson grips. On other bikes, you can just remove the stock rubber grip and then install the new grips onto the existing stock throttle tube.
Make sure that the throttle hasn’t slid too far up the handlebar. In case it is, and the throttle tube is open-ended, the rubber of the grip could be dragging on the end of the handlebar when twisting the throttle. This can cause the throttle to be less snappy while offering less control over your bike.
FAQs
Why does the grip stick on the handlebar?
When installing the throttle grip, you should slide it into place and tighten it down but turn the throttle slightly and then release it. If the grip sticks, two things could have happened. Either you have tightened the housing too much (the maintenance manual will give you torque specifications here) or you have pushed the grip too far onto the bar. It can be solved quickly by sliding the grip out slightly such that the gear is still engaging, but the end of the grip is not dragging on the end of the bar.
How to remove the hand grip?
There is a simple process of removing the hand grip on your Harley-Davidson bike. Start by loosening the housing on the throttle side before sliding the grip off the handlebar. Loosen the housing on the clutch side before prying or cutting the grip off the handlebar.
How to change the hand grip on the throttle side?
To change the hand grip on the throttle side, you’ll need to follow these simple instructions. Slide the grip or throttle tube into place. If you’re using a throttle tube, you should slide the grip over the tube, and then tighten the housing. Now, you should check to see if the grip is returning to the neutral position. If the grip sticks, you should adjust the housing tightness or slide the grip out slightly.
How to change the hand grip on the clutch side?
To change the hand grip on the clutch side, you should follow these simple steps. Slide the clutch side grip into place and mark the location for drilling divots. Remove the grip and drill the divots. If needed, you should apply grip adhesive to the bar. Slide the grip into position and then tighten the placement screws. Lastly, allow the glue to dry.

