Do you have a Harley Davidson Sportster and want to learn how to change the front brake pads? If so, you’ve come to the right place! This article outlines a step-by-step guide on how to successfully replace the front brake pads on a Harley Davidson Sportster. Not only is it an easy task, but it’s also a great way to save time and money by not having to take your bike to the shop. So, if you’re ready to learn how to change the front brake pads on your Harley Davidson Sportster, read on!
What are the front brake pads on a Harley-Davidson Sportster?
The front brake system on your Harley-Davidson Sportster plays a key role in your safety and control while riding. Understanding the components and characteristics of the front brake pads will be essential for maintaining optimal braking performance.
Front brake pads are an integral part of the braking system on your Sportster. They are responsible for creating the friction needed for slowing down or bringing your bike to a complete halt. As the primary braking mechanism, the front brake pads will work in conjunction with the brake rotor for converting kinetic energy into heat, providing the stopping power that you rely on.
Types of front brake pad materials
Harley-Davidson Sportsters generally come equipped with different types of front brake pads. Each material comes with its characteristics. The different types of front brake pads include – organic brake pads and semi-metallic brake pads.
Organic pads are made from a mix of organic fibers such as Kevlar, rubber, and carbon. These brake pads offer a smooth and progressive braking experience. They provide great initial bite, low noise levels, and are typically gentler on the brake rotors. However, they might wear out faster than other types and they’re more prone to brake fade under high-temperature conditions.
Semi-metallic brake pads are composed of a combination of metallic fibers and friction materials. They offer enhanced braking performance and durability. They are well-suited for aggressive riding styles, offer excellent stopping power, and offer improved heat dissipation. However, they tend to produce much more noise and might generate more brake dust.

When should you change the front brake pads?
The front brake pads on your Sportster are important for safety and overall performance. Being aware of the signs that indicate the need for replacement will help you address potential issues before they become major. If you notice decreased braking performance, observe thin brake pad thickness, hear squealing or grinding noises, experience vibrations or pulsations, or encounter warning lights or indicators, it’ll be time to consider changing the front brake pads.
Most front brake pads for the Harley-Davidson Sportster come equipped with wear indicators. These indicators are small metal tabs or grooves on the pad surface that become exposed as the pads wear down. When the wear indicators are visible or near the surface, this indicates that the brake pads have reached their wear limit and must be replaced promptly.
The replacement interval for front brake pads will vary depending on factors like riding style, pad material, terrain, and more. Typically, it is recommended that you inspect the front brake pads during routine maintenance intervals and replace them when they’ve reached the minimum thickness specified by the manufacturer.
When you’re replacing the front brake pads on your Sportster, it is important that you follow the manufacturer’s instructions and guidelines. Proper installation will ensure optimal performance and longevity. Moreover, after you have installed new brake pads, it’ll be important that you complete the bedding-in process. This process will allow the brake pads to adapt to the rotor surface, improving their effectiveness, and reducing the risk of noise or vibration.

Prerequisites when changing front brake pads on a Harley-Davidson Sportster
Maintaining a Sportster’s braking system will be crucial for safety and performance. When it comes to Harley-Davidson Sportster, understanding the proper process of changing the front brake pads will be essential for the rider. But before you can start with the actual process, you will need to outline the necessary equipment and safety precautions. By following these guidelines, you’ll be able to ensure a smooth and safe front brake pad replacement for your Sportster.
Tools and equipment that you need
#1. Front brake pad kit
Purchase a high-quality brake pad kit designed specifically for your Harley-Davidson Sportster model. Make sure that the pads are compatible with your motorcycle’s braking system and meet the manufacturer’s specifications.
#2. Socket set and wrenches
You must get a socket set and a set of wrenches for removing the necessary bolts and fasteners. It is recommended that you have a variety of sizes on hand to accommodate different components of the brake system.
#3. Torque wrench
A torque wrench will be important for achieving the proper torque specifications when tightening bolts. This will ensure that all components are secure without risking damage or overtightening.
#4. Brake cleaner
Use brake cleaner to remove dust, dirt, or contaminants from the brake caliper and other components. Having clean brake parts will help you maintain optimal brake performance and prevent premature wear.
#5. C-Clamp or piston compressor tool
Depending on your Harley-Davidson Sportster model, you might need a C-Clamp or piston compressor tool for compressing the brake caliper piston. This will be needed for making room for the new and thicker brake pads.
Safety precautions to take
#1. Safety gear
First, you will need to prioritize your safety by wearing appropriate safety gear, including gloves, safety glasses, and protective clothing. Working with brake pads involves potentially hazardous substances so taking precautions will be vital.
#2. Workspace preparation
Choose a well-lit, clean, and well-ventilated area to work on your Harley-Davidson Sportster. Make sure that your bike is on a stable surface and use a motorcycle stand or lift for raising the front wheel off the ground for easier access.
#3. Disconnection of battery
As a safety precaution, you must disconnect the negative terminal of your bike’s battery before you start any work on the braking system. This will help prevent any accidental activation of the brakes while working on them.
#4. Proper lifting and support
When raising your Sportster using a lift or motorcycle stand, you must follow the manufacturer’s instructions carefully. Make sure that the bike is properly supported so that you can avoid any accidents or damage.
#5. Brake fluid contamination
Brake fluid is corrosive and it could damage pained surfaces. Take precautions to prevent brake fluid from coming in contact with the bike’s bodywork by using appropriate containers or rags to catch any spills.
#6. System inspection
Before you install new brake pads, inspect other brake components like the rotor and brake lines for signs of wear or damage. Address any issues before you proceed to ensure optimal brake performance.
#7. Proper torque specifications
When installing new brake pads and tightening tools, you should refer to the manufacturer’s torque specifications. Over-tightening could damage components while under-tightening might compromise safety.
How to change front brake pads on Harley-Davidson Sportster
Changing the front brake pads is an important part of your Harley-Davidson Sportster’s maintenance. When you have to change the front brake pads, it will be important to follow the correct procedure. This will only be possible if you know the step-by-step instructions. Here, you will get to know how to change front brake pads on Harley-Davidson Sportster, ensuring a smooth and successful brake pad replacement process.
Step 1: Remove the wheel
Before starting, you must disconnect the negative terminal of your Sportster’s battery. This will help prevent accidental activation of the brakes during the process.
Now, using a socket set and wrenches, you should remove the axle nut and retaining hardware. Carefully slide the front wheel out from the forks, taking note of any spacers or washers and their specific positions. Then, keep the wheel aside in a safe location.
Step 2: Remove the brake caliper
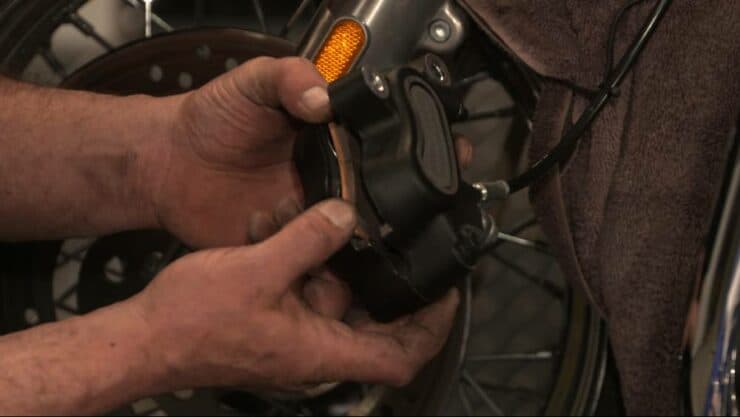
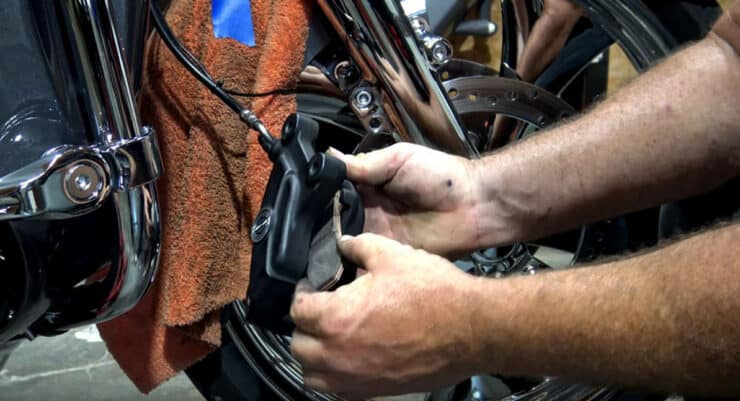
Now, you will need to locate the brake caliper. It will be attached to the front fork. With the help of an appropriate socket or wrench, loosen and remove the bolts securing the caliper to the fork. Gently slide the caliper off the brake rotor while taking care not to damage the brake line. Hang the caliper with the help of a wire or zip tie to avoid putting strain on the brake line.
Step 3: Inspect the brake pads
With the caliper removed, you should take the opportunity to carefully inspect the existing brake pads and other brake components such as the brake rotor. Look for any signs of excessive wear, damage, or uneven wear patterns. Make sure that the thickness is within the manufacturer’s specified limits. If the brake pads are worn beyond the recommended thickness or show signs of damage, they might have to be replaced.
Step 4: Remove the old brake pads
Using the appropriate tools, you must carefully remove the retaining clips or pins that secure the front brake pads in place. Gently slide the old brake pads out of the caliper while taking note of their orientation for the installation of the new pads.
Step 5: Install the new front brake pads
Take the new front brake pads and apply a thin layer of brake pad lubricant to the back surface. This will help reduce noise and vibrations. Make sure that the brake pads are properly aligned with the caliper and rotor. Slide the pads into the caliper, ensuring that they are securely seated and aligned with the rotor. Reinstall the retaining clips or pins to hold the front brake pads in position.
Step 6: Reinstall the calipers
Now, take the new front brake pads and apply a thin layer of brake pad lubricant to the back surface. This will help reduce noise and vibrations. Make sure that the brake pads are properly aligned with the caliper and rotor. Slide the pads into the caliper, ensuring that they are securely seated and aligned with the rotor. Reinstall the retaining clips or pins to hold the front brake pads in position.
Step 7: Reinstall the wheel
Lastly, you must retrieve the front wheel and align it with the fork. Carefully, slide the axle through the wheel, making sure that any spacers or washers are properly positioned. Thread the axle nut onto the axle and tighten it securely. You must follow the manufacturer’s instructions to torque the axle nut to the recommended specifications. Check that the wheel spins freely without any binding or interference.

Test the brake system after installation
Testing the front brake pads is important as it will help ensure optimal braking power and responsiveness. Here are two different methods through which you can test the front brake pads after installation. By performing these tests, you will be able to maintain a reliable and efficient braking system.
Brake bleeding
Brake bleeding is the process that removes air bubbles from the brake lines, ensuring proper hydraulic pressure and effective braking performance. It is recommended that you bleed the brakes when changing brake pads or if you notice a spongy or soft brake lever feel. Here is how to bleed the front brakes on your Harley-Davidson Sportster –
Step 1: Gather the tools and materials
- Brake fluid compatible with your Sportster’s specifications
- Clear plastic tubing and a catch container
- Wrenches or sockets to loosen the brake bleeder valve
- Clean rags or towels
Step 2: Prepare your bike
You must place your Harley-Davidson Sportster on a stable surface and use a lift or motorcycle stand to raise the front wheel off the ground. Make sure that your motorcycle is level to allow for proper bleeding.
Step 3: Steps for brake bleeding
- First, you should locate the brake bleeder valve on the front brake caliper, typically positioned on the top or side of the caliper
- Carefully attach one end of the clear plastic tubing to the brake bleeder valve while attaching the other end to the catch container
- Loosen the brake bleeder valve with the help of an appropriate wrench or socket
- The brake bleeder must be loose enough that it allows brake fluid and air to escape but tight enough that it prevents leakage
- Once the brake lever is released, you should slowly pump it a few times and hold it in a firm position
- Open the blade bleeder valve momentarily, allowing a small amount of brake fluid and trapped air to escape
- Then, close the valve before you release the brake lever
- Now, repeat this process, pumping the brake lever and opening the valve until clean brake fluid flows through the tubing without any air bubbles
- Keep an eye out on the brake fluid level in the reservoir and refill as needed during the bleeding
Test the brake system
Testing the brake system after installing the new front brake pads will be important to ensure their proper functionality and the overall integrity of the braking system. Here is how you can test the brake system on your Harley-Davidson Sportster –
Step 1: Check the brake lever feel
- Start your Sportster’s engine and let it idle
- Squeeze the front brake lever and assess its firmness, ensuring it offers resistance and engages smoothly without excessive play or sponginess
- If the lever feels soft or spongy or if you notice any abnormalities, it might indicate air in the brake lines or other issues that need further inspection
Step 2: Brake performance testing
- Look for a safe and open area where you can ride your bike
- Gradually increase your speed and apply the front brake progressively
- Carefully observe how your bike responds to the brake application
- The front brake must provide consistent and strong stopping power without any pulsations or excessive noise
- Pay close attention to any unusual vibrations, noises, or inconsistencies in the braking performance
- If there are any underlying issues, then these issues must be addressed promptly
Tips and considerations for your Harley-Davidson Sportster
Simply changing the front brake pads on your Harley-Davidson Sportster is not enough. You will need to follow certain tips and considerations to make sure the front brake pads perform optimally and ensure your safety on the road. Here are some of the important maintenance tips and additional considerations to help you keep your front brake pads in top condition. By following them, you will be able to extend the lifespan of your brake pads and enjoy a smooth and reliable braking experience.
#1. Regular inspection
Regularly inspecting the front brake pads will be important for identifying any signs of wear, damage, or other potential issues. You will need to follow certain inspection tips like checking the pad thickness, expanding pad wear indicators, looking for uneven wear patterns, and more.
You need to measure the thickness of the brake pads with the help of a caliper or refer to the manufacturer’s specifications. If they are below the minimum thickness level, you should replace the front brake pads.
Many brake pads have wear indicators that serve as a visual cue to replace them. In case the wear indicators are visible or near the surface, you should know it is time for new brake pads. Moreover, uneven wear can also indicate problems with the brake caliper or other components. You should address any issues promptly to make sure you get proper pad wear.
#2. Cleaning and lubrication
You must keep the brake components lean and properly lubricated as it’ll be vital for optimal performance and longevity. For proper cleaning and lubrication, you will need to make use of brake cleaner and lubricating sliding pins.
Regularly clean the brake calipers, rotors, and pads with the help of a brake caliper to remove any dirt, debris, and brake dust. Be cautious that you don’t spray cleaner directly onto painted surfaces. If your Sportster’s brake system has sliding pins, you must lubricate them with high-temperature brake lubricant to ensure smooth movement and prevent sticking.
#3. Brake fluid inspection
Another maintenance tip to take care of your front brake pads will be brake fluid inspection. Maintaining the proper brake fluid level and quality will be crucial for optimal brake performance.
You need to regularly inspect the brake fluid level in the master cylinder reservoir. If it is low, top it up with the manufacturer-recommended brake fluid. Brake fluid must be clear or slightly amber. If it appears dark or discolored or has contaminants, it might be time for a brake fluid flush and replacement.
#4. Bedding-in process
Once you have installed new front brake pads, it will be essential that you properly bed them in. This process will allow the pads to adapt to the rotor surface and ensure optimal braking performance. Here are the steps you will need to follow –
- First, you should find a safe and open road or parking lot to perform the bedding-in process
- Gradually increase the speed and apply the brakes firmly but smoothly
- Repeat this process several times, allowing the pads to heat up and cool down between brake applications
- Avoid aggressive or excessive braking during the bedding-in process to prevent damage or glazing of the pads
Also Read: How to Change Handlebars on a Harley?
FAQs
What tools are needed for changing front brake pads on a Harley Davidson Sportster?
Changing the front brake pads on a Harley Davidson Sportster requires a few basic tools, including a metric socket set, metric wrenches, a ratchet, and a screwdriver. You may also need a torque wrench, needle-nose pliers, and a tube of brake lubricant.
How do I remove the front brake pads on a Harley Davidson Sportster?
To remove the front brake pads on a Harley Davidson Sportster, first use the metric socket set to remove the caliper bolts, then remove the caliper from the rotor. Next, use the metric wrenches to loosen the brake pad mounting bolts and slide the pads out of the caliper. Finally, use the screwdriver to clean off any excess dirt or debris on the pad mounting surface.
What steps should I take after replacing the brake pads on my Harley Davidson Sportster?
After replacing the brake pads on your Harley Davidson Sportster, it’s a good idea to check the caliper and rotor for any signs of wear or damage. Make sure the caliper is securely mounted to the rotor and that the brake fluid is at the correct level. It’s also important to check the brake lines


