Are you an experienced motorcycle rider who loves to maintain their bike? Do you want to learn how to change your front brake pads on your Harley Road King? If so, then you have come to the right place!
To change front brake pads on a Road King, remove the caliper bolts to slide off the caliper, replace the old pads with new ones, and reinstall the caliper, ensuring bolts are torqued to specifications.
In this comprehensive step-by-step guide, we will walk you through all the necessary steps to change your front brake pads on your Harley Road King. With clear and concise instructions and pictures, you will be able to easily learn how to complete this task. So, let’s get started!
Front brake pads in a Harley-Davidson Road King
The Harley-Davidson Road King is a legendary motorcycle known for its classic design and powerful performance. As a biker, ensuring optimal safety and stopping power will be crucial, and the front brake system will play a key role in achieving that. It is important to explore the importance of front brake pads for the Harley-Davidson Road King and highlight different considerations when choosing the right brake pads for this iconic motorcycle.
#1. Braking efficiency and performance
The front brake system on the Harley-Davidson Road King will be responsible for a significant portion of the motorcycle’s braking power. Front brake pads play a key role in converting the rotational energy of the wheels into heat and friction, allowing for efficient and reliable deceleration. High-quality brake pads will provide consistent and predictable braking performance, ensuring that you can confidently control your Road King in various riding conditions and emergency situations.
#2. Durability and longevity
Front brake pads tend to experience significant wear and tear because of the consistent friction against the brake rotors. It is important that you select brake pads that are durable and capable of handling the demands of the Road King’s weight and power. You must be using brake pads made from quality materials that offer a balance between long-lasting performance and rotor-friendly characteristics for minimizing wear on the braking system.
#3. Heat dissipation
During braking, the front brake pads generate considerable heat because of friction. Adequate heat dissipation will be essential to maintaining optimal braking performance and preventing brake fade, where the braking efficiency diminishes because of excessive heat buildup. You should be using brake pads that have effective heat dissipation properties, such as heat-resistant materials or special ventilation slots, to make sure you’re getting consistent and reliable braking performance even during prolonged or aggressive braking.
#4. Compatibility and fitment
When you’re choosing front brake pads for your Harley-Davidson Road King, make sure that they are specifically designed and compatible with your bike’s make and model. Different models might have variations in brake caliper design, rotor size, or brake pad size. You must consult the motorcycle’s owner’s manual or look for advice from reputable dealers or professionals to make sure you get proper fitment and compatibility, guaranteeing optimal braking performance and safety.
#5. Riding style and conditions
Consider your riding style and typical riding conditions when you are selecting front brake pads for your Harley-Davidson Road King. If you frequently ride in urban areas that face heavy traffic, brake pads with initial bite and progressive modulation will be preferable for confident and controlled braking. On the other hand, if you embark primarily on long-distance touring or encounter mountainous terrains, front brake pads that excel in heat management and offer consistent performance during prolonged braking might be more suitable.
#6. Quality and brand reputation
When you are investing in high-quality brake pads, buying them from reputed manufacturers will be important for safety and performance. Trusted front brake pads brands have a track record of delivering reliable and efficient braking solutions. You should look for front brake pad manufacturers known for their commitment to quality, extensive testing, and compliance with industry standards to make sure you are getting a reliable product that meets the demands of your Harley-Davidson Road King.

Tools and materials needed for changing front brake pads on a Road King
Maintaining the braking system of your Harley-Davidson Road King is important for safe and confident riding. As a biker, knowing how to identify the necessary parts for tools for front brake pad replacement will empower you to take control of your bike’s maintenance. Before you can change or replace the front brake pads, you will first want to know the right tools and materials that you should be using. Here are the parts and tools needed for changing the front brake pads on your Road King, allowing you to carry out the process efficiently and effectively –
#1. Front brake pads
First, the primary component that you will need for replacement will be the front brake pads. You should make sure that you select the brake pads specifically designed for your Road King model. You should look to use high-quality front brake ads that are compatible with your bike’s brake calipers and offer the desired characteristics such as heat dissipation, durability, and reliable braking performance. Furthermore, you should consider reputed brands for producing reliable and long-lasting brake pads.
#2. Brake pad retaining pins and clips
When you are replacing the brake pads, it is advised that you should inspect the retaining pins and clips that hold the pads in place. If these components are showing any signs of wear or damage, it is recommended that you replace them along with the brake pads. Make sure that you have the appropriate retaining pins and clips compatible with your Road King model.
#3. Brake cleaner
Before you install the new brake pads, it’ll be important to clean the brake calipers and rotors to remove any dirt, grime, or brake dust. A brake cleaner is a specialized solvent that removes contaminants and ensures proper pad-to-rotor contact for optimal braking performance. Make sure that you have a suitable brake cleaner solution for use during the replacement process.
#4. Brake lubricant
To prevent brake sequel and ensure smooth operation, you’ll be applying a thin layer of brake lubricant for certain contact points. Brake lubricant can be easily applied to the backside of the brake pads where they contact the caliper pistons and any other areas specified in the bike’s service manual. You should ensure you’re using a brake-specific lubricant compatible with your Harley-Davidson Road King’s braking system.
#5. Hand tools
Various hand tools are typically needed for front brake pad replacement. These could include a socket set, an Allen key set, and wrenches, depending on your bike’s specific requirements. You must make sure you’ve got the appropriate hand tools in various sizes to fit the different bolts and fasteners on your Road King.
#6. Brake piston compression tool
Some Harley-Davidson Road King models might require a brake piston compression tool for retracting the caliper pistons and making room for the new, thicker brake pads. Check your bike’s service manual or consult a trusted source for determining if your specific model needs this tool for the brake pad replacement process.
#7. Owner’s manual or repair guide
Having access to the owner’s manual or repair guide specific to your Road King model will be invaluable during brake pad replacement. These resources will provide detailed instruments, torque specifications, and diagrams to guide you through the process. You must make sure that you have the appropriate manual or guide readily available before you start the front brake pad replacement.

How to change front brake pads on a Harley Road King: Preparation
Carrying out routine maintenance tasks on your Harley-Davidson Road King, such as changing the front brake pads on your bike, will be important for optimal braking performance and safety. Before you find out how to change front brake pads on a Harley Road King, it’ll be important to prepare your Harley properly. Here, you will get to know how to prepare your bike before you change the front brake pads on your bike –
#1. Ensure safety and preparation
Prioritize safety by choosing a properly lit, level surface where you can work on. Engage your Harley’s parking brake and switch off the engine. Moreover, you should be wearing appropriate safety gear, including eye protection, gloves, and chaps to safeguard yourself against any potential hazards during the process. Moreover, you should note that before you start any maintenance procedure, you must consult your Road King’s service manual for model-specific instructions and safety precautions.
#2. Lifting the front of your Road King
You must obtain a suitable motorcycle lift or jack that is capable of safely supporting the weight of your Harley-Davidson Road King. Position the lift or jack directly underneath the frame of the bike, ensuring that it is stable and securely in place. Follow the manufacturer’s instructions for using the lift or jack to elevate the front of the motorcycle. This might involve engaging lifting mechanisms or using a hydraulic system. Lift your bike until the front wheel is slightly off the ground, allowing it to rotate freely.
#3. Locate the braking caliper and caliper pin
The brake caliper is typically positioned above the front wheel on the Harley-Davidson Road King. It houses the brake pads and is responsible for applying pressure to the rotor to facilitate braking. You can easily identify the brake caliper by its rectangular or horseshoe shape, depending on the model years of the Road King. You must locate the caliper pins that secure the caliper in place. These pins typically feature a rubber or plastic boot covering them for protection against debris. Moreover, you must also inspect the caliper pins and boots for any signs of wear or damage. If needed, you could consider replacing these components along with the brake pads.
How to change front brake pads on a Harley Road King: Removing the brake pads
Replacing the front brake pads on your Harley-Davidson Road King is a key maintenance task to ensure optimal braking performance and safety. If you know how to remove the front brake pads, it’ll be easier for you to carry out this task safely and effectively. Further, it will also set the stage for a successful brake pad replacement for your Harley-Davidson Road King.
Step 1: Access the brake caliper and pin
You would have already located the front brake caliper in the previous step. Typically, it is positioned above the front wheel of your Road King. The caliper pin is a securing mechanism that’ll hold the brake pads in place within the caliper. It is usually a rubber or plastic boot for protection against debris. You need to examine the caliper pin for identifying its configuration and determining the appropriate tool needed for removing it. Depending on the model year of your Harley-Davidson Road King, it might require an Allen key, a wrench, or a Torx key.
Step 2: Remove the caliper pin
Now, you need to insert the appropriate tool into the head of the caliper pin. After that, rotate the tool counterclockwise for loosening and removing the caliper pin. Be cautious that you do not apply excessive force for preventing damage. Then, carefully set aside the caliper pin in a secure location, making sure that it doesn’t come in contact with dirt or any contaminants.
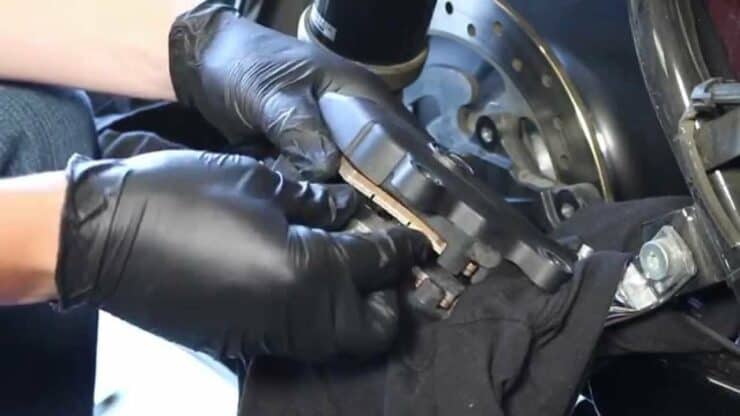
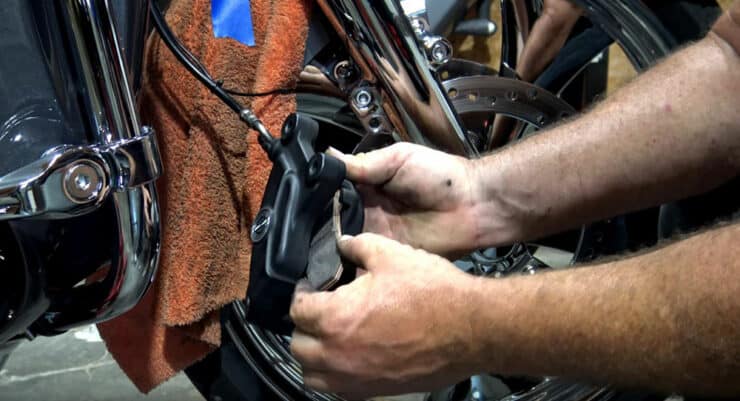
Step 3: Extract the old brake pads
Once the caliper pin has been removed, the brake pads will be easily accessible. You can gently grasp the brake pads and pull them outward and away from the caliper. Apply even pressure for preventing any unnecessary strain on the components. Inspect the brake pads for wear and assess their condition. You should note any signs of uneven wear, excessive thickness, or damage as this might indicate other underlying issues that require attention. If needed, you should take this opportunity to clean the brake caliper and rotor surfaces using a suitable brake cleaner and a lint-free cloth. This will help remove any accumulated brake dust, debris, or contaminants.
How to change front brake pads on a Harley Road King: Install new brake pads
Installing new front brake pads on your Harley-Davidson Road King is an important step once you have already prepared the bike and removed the old front brake pads. Here, you will get to know the step-by-step process of installing new front brake pads on your Road King. By following these steps, you can successfully complete the installation of new brake pads on your Road King –
Step 1: Prepare the new front brake pads
Before you insert the new brake pads, you should make sure that they are compatible with your Harley-Davidson Road King model and meet the necessary specifications. You must take note of any shims or noise-reducing components that were present on the old brake pads and transfer them to the corresponding locations on the new brake pads if needed.
Step 2: Insert the new brake pads
Now, you will need to hold the new brake pads with their friction material facing the brake rotor. Carefully align the tabs or edges of the brake pads with the slots or guides in the brake caliper. After that, you should insert the brake pads into the caliper, sliding them in until they are securely positioned. Make sure that the brake pads are properly seated within the caliper and aligned with the rotor. They must fit snugly and should not be loose or misaligned.
Step 3: Secure the caliper pin
First, you should retrieve the caliper pin that was previously removed and then ensure it is clean and free from any debris. After that, carefully insert the caliper pin through the holes, making sure that it goes through both brake pads and aligns with the caliper bracket on the other side. Then, you should rotate the caliper pin clockwise for threading it back into place. Make use of appropriate tools for tightening the caliper pin securely but avoid over-tightening it.
Step 4: Verify proper installation
Make sure that the brake pads are secured in place within the caliper and aligned with the brake rotor. Then, you should gently push and pull on the front brake pads for confirming that they’re firmly seated and do not move excessively. Check that the caliper pin is threaded and tightened properly to make sure it is snug but not overly tight.

How to change front brake pads on a Harley Road King: Testing the brakes
Once you have successfully installed new front brake pads on your Harley-Davidson Road King, it’ll be important that you perform a final check to make sure you’re getting proper brake function and overall system performance. Here are the steps that you will need to follow to check the brake function and test the brakes. These steps will allow you to confidently conclude the front brake pad installation on your Road King –
Step 1: Visual inspection
First, you need to visually inspect the front brake caliper, brake pads, and brake rotor for any signs of damage, misalignment, or loose components. Make sure that all bolts, pins, and fasteners are securely tightened.
Step 2: Check the brake lever resistance
Begin by squeezing the front brake lever slowly and observing the resistance that it offers. The lever needs to offer firm and consistent resistance. In case it feels too spongy or loose, it could mean there is air in the brake lines or an issue with the hydraulic system. If necessary, you should be open to consulting a professional.
Step 3: Test the brakes
Start your Road King and take it for a short ride in a safe and controlled environment. Begin at low speeds and gradually increase the speed while you’re testing the brakes. Apply the front brake lever gently but firmly so that you can test the responsiveness and effectiveness of the front brakes. Carefully observe the stopping power and make sure that your bike comes to a smooth and controlled stop. Pay close attention to any unusual noises, vibrations, or pull to one side, which might indicate issues with the brake system that need further inspection.
Step 4: Verify brake pad alignment and function
After your test ride, you must inspect the brake pad alignment by visually checking the clearance between the brake pads and the brake rotor. Make sure that the brake pads are making even contact with the rotor surface and that there aren’t any signs of excessive wear or dragging. Listen for any abnormal noises or squealing. Such signs indicate improper alignment or contamination of the brake pads or rotor. You need to address these issues promptly.
FAQ
What tools are needed to change front brake pads on a Harley Road King?
Changing front brake pads on a Harley Road King requires a few basic tools, including a socket wrench, torque wrench, and oil filter wrench. It’s also recommended to have a suitable workbench, protective gloves, and a rag for cleaning the brake pad area.
How do I remove the front brake pads on a Harley Road King?
To remove the front brake pads on a Harley Road King, first loosen the lug nuts on the caliper and remove the caliper. Then, use a socket wrench to remove the two bolts that secure the brake pads to the caliper. Finally, remove the old brake pads and clean the area before installing the new pads.
What is the proper torque for the bolts used to secure the front brake pads on a Harley Road King?
The proper torque for the bolts used to secure the front brake pads on a Harley Road King is 20 ft-lbs. It’s important to use a torque wrench to ensure the proper tightness of the bolts and to avoid any damage to the brake system.

