Riding a Harley-Davidson Touring motorcycle is a great way to explore the open road, but like all vehicles, it requires regular maintenance. One of the most important aspects of keeping your bike in top condition is making sure your tires are in good shape. That’s why the question of how often you should replace your Harley-Davidson Touring tires is so important. In this article, we’ll go over the key factors that determine when it’s time to replace your tires and provide some tips on how to extend their life. So, if you’re a Harley-Davidson Touring rider, read on to find out how to ensure you get the best performance and safety from your tires.
How often should I replace my Harley-Davidson Touring Tires?
In the world of Harley-Davidson touring, the road is essentially a symphony of exploration and freedom. Key to this melody will be the rubber that hugs the pavement beneath you. In simple words, the tires that carry you through horizons hold the key to a comfortable and safe ride. However, over time, the tires tend to wear down and if not replaced on time, may even result in accidents. Now, you might wonder how often should I replace my Harley-Davidson Touring Tires. The answer is quite simple and can be vital to your riding experience.
On average, Harley-Davidson tires are capable of lasting 5,000 to 30,000 miles depending on a variety of factors. The rear tires are capable of delivering around 5,000 to 17,000 miles. Meanwhile, front tires can range between 8,000 to 30,000 miles. To be on the safe side, you should preferably replace your tires after 5,000 to 8,000 miles or 2 years, whichever comes first.
The timing of when to replace the touring tires plays a key role in defining the performance and comfort of the tire. There are multiple factors that play a role in deciding how often you should replace your Harley-Davidson Touring Tires. Here are some of those factors that will help you with how often should I replace my Harley-Davidson Touring Tires.
#1. Type of riding
The type of riding you indulge in has a major impact on tire wear and lifespan. Are you a cruiser who leisurely glides through scenic routes? Or do you embrace an aggressive riding style with rapid accelerations and tight turns?
The more spirited your riding style, the more stress you put on the tires. Aggressive riding can result in faster wear, especially on the tire’s edges. Understanding how your riding habits affect tire wear will allow you to tailor the replacement schedule to your unique journey.
#2. Tire usage and wear patterns
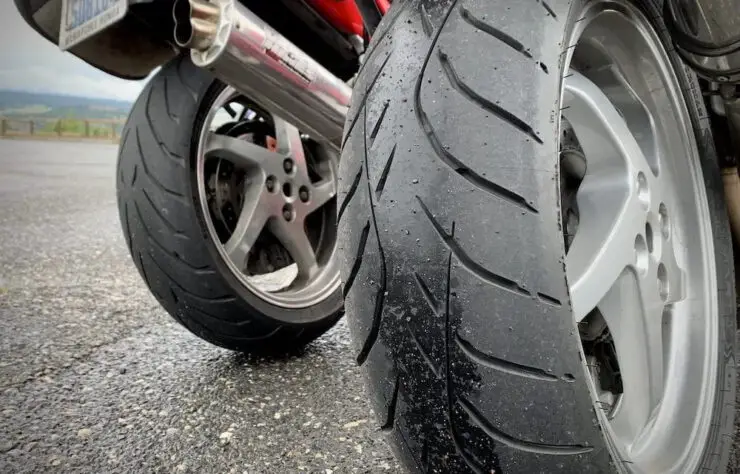
The way you use your tires leaves behind clues in the form of wear patterns. If you’re noticing uneven wear, such as one side of the tire wearing out faster than the other, it might be a sign of improper alignment or balance issues.
Regularly inspecting the tire wear patterns and addressing any misalignments will help extend the life of the tires. Familiarize yourself with the condition of the tread, ensuring that it doesn’t dip below the minimum required depth for safe riding.
#3. Local climate conditions
The climate in your riding condition greatly influences tire wear and degradation. In hot and dry climates, tires might age more rapidly due to increased exposure to UV radiation.
Meanwhile, in wet and rainy environments, tread performance and hydroplaning resistance are important considerations. Adjust your replacement timeline as per the climate’s impact on tire integrity and performance.

#4. Tire maintenance and care
The level of tire maintenance and care also has a role in determining how often you should replace your Harley-Davidson Touring Tires. Proper tire inflation, regular balancing, and periodic rotation can contribute to even wear distribution, extending the life of the tires.
Moreover, maintaining consistent tire pressure will not only enhance safety but also optimize fuel efficiency and tire longevity. Routinely check for debris and foreign objects embedded in the tread as they can result in punctures and compromise tire integrity.
#5. Tread depth
The depth of the tire’s tread is another indicator of the tire’s condition and performance. Tread depth has a direct impact on traction, grip, and braking capabilities, especially on wet or uneven surfaces. A general guideline would be to replace touring tires once the tread depth reaches 2/32 of an inch or lower. Adequate tread depth will ensure optimal control and minimize the risk of hydroplaning on wet roads.
#6. Mileage accumulation
The number of miles you clock on your Harley-Davidson Touring Bike plays a vital role in tire deterioration. Manufacturers often provide estimated mileage ranges for their tires. However, this can vary based on factors like riding style, road conditions, and load. You must keep track of your mileage and consult your tire manufacturer’s recommendations to gauge when the next replacement is due.
#7. Tire age
Tire age is often an overlooked factor but it is still important for determining when to replace your Harley-Davidson Touring Tires. Regardless of tread depth, tires can degrade over time due to environmental factors like sunlight, moisture, and temperature changes. Generally, motorcycle tires must be replaced every 2-5 years, even if they appear to have sufficient tread. Check the tire’s sidewall for the manufacturer’s date to determine its age.
#8. Load and inflation
Proper tire inflation and load capacity are key factors for tire longevity and performance. Overloading the touring tire or underinflating the tires can result in uneven wear, decreased handling, and reduced tire life. You must follow the manufacturer’s recommended tire pressure and load capacity guidelines to ensure your tires perform optimally and last longer.
#9. Visual cues
Regular inspection is a simple yet effective way of monitoring the condition of your Harley-Davidson Touring Tires. You must look for signs of cracks, cuts, punctures, or bulges on the tire’s surface. Any visible damage could compromise the tire’s structural integrity and safety, warranting immediate replacement.
#10. Manufacturer recommendations
The manufacturer’s recommendations also serve as valuable guidelines for tire replacement. They consider the tire’s design, estimated lifespan, and intended use. You must consult your tire manufacturer’s guidelines to determine the optimal tire frame or replacement based on their expert insights.
How to choose the right replacement tires for your Harley-Davidson Touring Bike
For Harley-Davidson touring enthusiasts, the journey isn’t always about reaching the destination. It is more about the seamless fusion of power, comfort, and safety that one gets while riding a Harley that defines the ride. Pivotal to this experience are your Harley-Davidson Touring Bike’s tires that grip the road and deliver a splendid driving experience. When choosing the right tires for your Harley-Davidson Touring bike, there are certain considerations that you must keep in mind. These considerations will help you pick out the best option for your needs. Here are some of the key considerations to choose the right replacement tires for your Harley-Davidson Touring Bike.
Understand tire specifications
Tire specifications are a coded language that offers insight into the tire’s size, capabilities, and intended use. On the sidewall of each tire, you will notice a series of numbers and letters. These numbers will tell you the tire’s width, aspect ratio, and wheel diameter.
The first number will indicate the tire’s width in millimeters. The second number will represent the aspect ratio (sidewall height as a percentage of the width), and the third number will indicate the wheel diameter in inches. The load index number corresponds to the maximum weight a tire can support when inflated properly. A higher load index will indicate greater weight-bearing capacity.
The speed rating letter denotes the maximum speed that the tire can handle safely. It is vital to match the speed rating to your bike’s capabilities and riding style. You will find info about whether the tire is tubeless (TL) or needs an inner tube (TT).
Tire durability
Durability is an important factor when choosing tires for your Harley-Davidson Touring bike. The ability of the tires to withstand different road conditions, weather variations, and riding styles is important for a safe and enjoyable journey.
Tread patterns greatly influence tire grip, stability, and handling. You must look for tires having a robust tread design that offers adequate traction on wet and dry roads. Tire compounds impact grip, longevity, and performance. Some tires feature a harder compound for enhanced durability whereas others prioritize grip for superior handling.
You must consider the estimated mileage expectancy provided by the tire manufacturer. While this could vary based on riding conditions, understanding the general lifespan of a tire will help you plan for replacements in advance.
Comfort
Comfort is another key consideration for touring enthusiasts who spend extended periods on the road. A comfortable ride isn’t just enjoyable but also contributes to reduced fatigue and overall safety.
Tires having a softer sidewall construction tend to offer a smoother ride by absorbing road irregularities and shocks. This is especially important for touring bikes that cover long distances. Tread patterns and tire construction affect the amount of road noise transmitted to the rider. Quieter tires create a more pleasant and peaceful riding experience. Some tires are designed with features to minimize vibrations, enhancing the overall comfort of your ride.

Performance
Performance is arguably the most important consideration for touring tires. Having touring tires that perform well plays a significant role in the potential of your ride.
Tread patterns dictate traction, grip, and handling characteristics. For spirited riding and responsive cornering, you must consider tires with aggressive tread designs that offer optimal contact with the road. Moreover, you should consider tires that offer confident cornering stability, especially when leaning into turns. Tires designed to maintain their shape during cornering enhance both safety and performance.
The tire should also be able to handle wet-weather conditions. Riding conditions aren’t always ideal and tires that excel in wet-weather handling can offer peace of mind during unexpected rain showers. Tread patterns designed for efficient water dispersion enhance grip on wet surfaces.
Tire selection
Selecting the right tires for your Harley-Davidson Touring motorcycle is an art that balances your riding preferences and the bike’s characteristics. You can choose from touring tires, sport-touring tires, radial, and more.
Touring tires prioritize comfort and longevity, making them ideal for long-distance journeys. You must look for tires that deliver a smooth and stable ride, especially on highways. Sport-touring tires combine elements of both sport and touring tires, offering enhanced cornering capabilities while maintaining long-distance comfort.
Radial tires offer amazing stability and cornering performance, which makes them perfect for riders looking for a dynamic experience. Meanwhile, bias-ply tires emphasize load capacity and comfort, catering to those who prioritize long-haul journeys.
Price
While the allure of high-performance tires is pretty strong, the price point is a consideration that you must keep in mind. Balancing your performance aspirations with your budget will involve thinking about research, longevity, and value.
You must compare tire prices across different brands and models. Consider reading reviews and seeking recommendations from other riders to gauge whether the performance benefits align with the cost.
While high-performance tires might come with a higher upfront cost, they generally offer greater longevity, potentially offsetting the initial investment over time. You must consider the value touring tires bring to your riding experience. A higher-priced tire with superior performance characteristics might provide more satisfaction, justifying the cost.
How to install new touring tires on your Harley-Davison Touring Bike
The process of installing new tires on your Harley-Davidson Touring Bike is a journey in itself. From preparation to installation, different steps contribute to an easy and smooth transition to new tires. Here are the steps you need to follow for installing new touring tires on your Harley-Davidson Touring Bike.
Prepare the tires
Before you embark on the tire installation process, there are a few preparatory steps to ensure you have a seamless experience. This involves gathering tools, inspecting rims, and checking tire direction.
First, you need to equip yourself with the necessary tools, including tire irons, a valve stem tool, and bead lubricant. Moreover, you will also need a new pair of touring tires for your touring bike. These tools will facilitate the removal of old tires and the installation of new ones.
Examine your motorcycle’s rims for any signs of damage, corrosion, or irregularities. A smooth and well-maintained rim surface is vital for proper tire seating and sealing.
You must also check tire direction. Many tires are designed to rotate in a specific direction for optimal performance. You must make sure that you check the arrows on the sidewall that indicate the correct rotational direction.

Install the tires
The tire installation process will require care and precision to ensure a secure fit. Begin by deflating the old tires and carefully removing them from the rims. Make use of tire irons to pry the tire away from the rim, working your way around until the tire is free.
Now, place the new tire onto the rim, starting with the side opposite the valve stem. Use tire irons and gradually work the tire around the rim, taking care that you don’t end up damaging the tire or rim in the process.
With the tire fully mounted on the rim, you should inflate it slightly to let the beads to sit properly. Make sure that both beads of the tire are seated properly within the rim’s bead seat.
Then, insert the new valve stem into the rim and then secure it. This is also a great time to add some air to the tire to facilitate the balancing process.
Balance the tires
Balancing the newly installed tires is important for a smooth and vibration-free ride. Make use of a wheel balancer to determine where additional weight is required for balancing the tire. The balancer will guide you in placing adhesive weights at specific points on the rim.
Dynamic balancing involves adding weights to specific spots on the rim to counteract any imbalances. This process will ensure that the tire spins smoothly, reducing vibrations at various speeds.
Static balancing will involve ensuring that the weight distribution is uniform around the entire tire. This is important for maintaining stability and minimizing tire wear.
Pre-installation checklist to follow before tire replacement
Ensuring a smooth and successful tire installation process will require meticulous attention to detail and a comprehensive pre-installation checklist. Here are some of the crucial steps you must tick off the list before tire replacement. This checklist will ensure every element is in place before you embark on the journey of installing new tires.
#1. Arrange tools and equipment
Before you start the tire installation process, make sure that you’ve arranged the necessary tools and equipment –
- Tire irons – These will be important for safely and effectively removing the old tires from the rims
- Valve stem tool – You will require them for removing and replacing the valve stem on the new tires
- Bead lubricant – A lubricant will help ease the process of mounting the tire onto the rim
- Wheel balancer – This tool is important for balancing the newly installed tires and ensuring a smooth ride
- Adhesive wheel weights – These weights are needed for dynamic balancing and achieving optimal tire balance
#2. Review manufacturer’s guidelines
You must refer to your Harley-Davidson bike’s owner’s manual and the tire manufacturer’s guidelines to gather essential information. Verify that the new tires you have are the correct size and capacity for your bike. Moreover, you should understand the manufacturer’s recommendations for tire inflation to ensure proper performance and safety.
#3. Clear workspace and bike area
Creating a clutter-free and organized workspace is vital for a smooth installation process. You must choose a well-lit and clean area to work on your bike. A garage or a dedicated space will be ideal. Moreover, you should make sure that your motorcycle is securely supported on a center stand or a motorcycle lift to prevent any accidents or falls during the tire installation.
#4. Keep yourself safe by using safety gear
Personal safety must be a priority during the tire installation process. Wear safety gloves to protect your hands from sharp edges and potential injuries. Safety goggles will shield your eyes from debris or particles that may be dislodged during the tire removal or installation process.
#5. Plan for proper disposal
You should also consider how you will be disposing of the old tires in an environmentally friendly manner. Look for local recycling programs that accept old tires to ensure they are disposed of responsibly.
#6. Allocate enough time
Tire installation requires focus and precision. You must allocate sufficient time to avoid rushing the process. Set aside dedicated time without interruptions to focus on the task at hand. Installing a new tire requires attention to detail so you shouldn’t rush through any step.
Post-installation checklist to follow after tire replacement
Installing new tires on your Harley-Davidson Touring Bike is a transformational moment that can greatly enhance performance and safety. However, your work isn’t complete once you install new tires. Here is a thorough post-installation checklist that ensures that every detail is inspected, adjusted, and validated before you embark on the open road.
#1. Double-check tire pressure
Ensuring proper tire pressure is vital for safety and performance. You must refer to your bike’s owner’s manual or the manufacturer’s guidelines for confirming the recommended tire pressure for both front and rear tires.
Make use of a reliable tire pressure gauge for measuring the pressure in each tire. Make adjustments as required to match the recommended values.
#2. Verify tire positioning
Confirm that the tires are mounted in the correct orientation. If the new tires have a specific direction of rotation indicated by an arrow or the sidewall, ensure that they have been mounted properly.
If the tires are non-directional, you should check that they have been installed with the proper rotation to prevent uneven wear.
#3. Inspect tire seating
A thorough inspection of tire seating on the rims is important for safety and stability. Examine both sides of each tire to ensure that the beads are properly seated within the rim’s bead seat. Moreover, you should check for any irregularities or bulges that can indicate improper seating or potential issues.
#4. Test for leaks
Avoid potential problems by checking for air leaks before you hit the road. Apply a mixture of soapy water around the valve stem, rim, and bead area. If you notice any bubbles forming, it will indicate a potential leak that must be addressed.
#5. Inspect wheel balance
Wheel balance is important for a smooth and vibration-free ride. You need to check that the wheel weights have been applied correctly to ensure proper balance. Take a short ride to verify that the new tires are balanced and that there are no vibrations at various speeds.
#6. Ride responsibly
After you have installed new tires, take your Harley-Davidson Touring Bike for a cautious test ride. Start with a gentle ride to gradually test the new tires and make sure they feel secure. Then, you should gradually increase the speed to assess how the tires handle acceleration and braking.
#7. Monitor tire wear
You must regularly monitor tire wear as it’ll help you identify potential issues early on. Keep an eye on the tread depth over time to ensure that the tires are wearing evenly. Regularly inspect the tires for any signs of damage, punctures, or unusual wear patterns.
#8. Maintain proper tire care
To prolong the life of the new tires, you must practice proper maintenance. Check tire pressure regularly and maintain it within the recommended range. Keep the tires clean to prevent debris buildup and ensure optimal traction.
FAQs
How frequently should I replace my Harley-Davidson Touring tires?
It is recommended to replace the tires on your Harley-Davidson Touring bike every 5,000 to 8,000 miles or after two years, whichever comes first. The tires should also be inspected regularly for signs of wear, damage, or other issues that may affect performance and safety.
What signs should I look for when inspecting my tires?
When inspecting your tires, you should look for signs of visible damage, such as cuts, bulges, or other irregularities in the tread or sidewalls. You should also look for signs of wear, such as uneven tread wear or excessive tread depth. In addition, you should check the tire pressure regularly to make sure it is at the manufacturer’s recommended level.
What is the best type of tire for my Harley-Davidson Touring bike?
The best type of tire for your Harley-Davidson Touring bike will depend on your riding style and terrain. For touring, you may want to consider an all-season touring tire for improved stability and handling on wet roads. For performance riding, you may want to consider a sport touring tire for improved cornering and grip. Regardless of the type of tire you choose, it’s important to make sure the tires meet the demands and help you enjoy the best possible ride.
>>> Read more about Tires For Harley-Davidson Touring <<<


