Is your Harley-Davidson bike giving you unreliable performance due to discharged battery, and you’re looking for ways to fix it? If yes, then you’re in the right place!
To charge a Harley-Davidson battery, connect a trickle charger or battery tender to the battery terminals. Ensure the charger is compatible with motorcycle batteries and connect the positive lead first, followed by the negative lead. Allow the battery to charge until the charger indicates a full charge.
It is all a fairly simple process as long as you know the right instructions. In this article, you’ll get to know how to charge Harley-Davidson battery, how often to charge it, how to make it last longer, and more.
How to charge Harley-Davidson battery on your bikes?
Every Harley-Davidson motorcycle owner will eventually run into the problem of a battery that needs charging. At that point, you’ll need to know how to charge a Harley-Davidson battery. If you don’t, it’ll be a massive inconvenience, as starting a Harley-Davidson bike with a dead battery will be tough. Using a battery charger will be the easiest and most convenient way of fixing a discharged battery. Continue reading as you’ll get to know how to charge Harley-Davidson battery and say goodbye to a dead battery.
1. Find your Harley-Davidson bike’s battery type
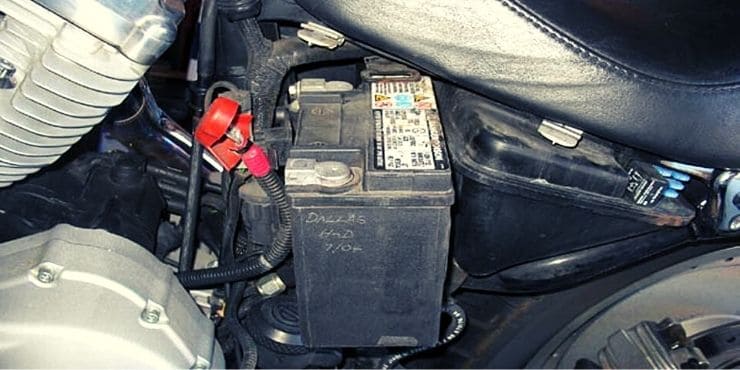
Harley-Davidson bike batteries will come in different shapes and sizes. Sometimes, you may be unsure of the type of battery your motorcycle is using. In such instances, you should look for this information in the owner manual. Alternatively, you’ll also get this information printed on the side of the motorcycle battery itself.
2. Use a float, tricky, or smart charger for almost all battery types
These kinds of chargers will work really well for gel, lead-acid, or absorbed glass mat batteries. Avoid using these types of charges with lithium batteries.
Trickle or manual chargers will be the easiest type of chargers to use. They will take the AC power before converting it to DC power. However, once the charging is done, you must turn off these chargers; otherwise they’ll keep on pushing energy.
Meanwhile, float chargers are yet another common type of chargers. They will provide a constantly gentle current to your bike’s battery.
Smart chargers, on the other hand, will monitor battery charging progress. These types of chargers will minimize the damage to the battery. These chargers normally stop charging as soon as the battery is full. Unfortunately, smart chargers don’t work very well with lithium batteries.
3. Get a specialized charger for lithium batteries
Lithium batteries for Harley-Davidson bikes include lith ion, lithium phosphate, and lith-iron, and they require a different type of charger. The different lithium batteries will also need specialized batteries depending upon the manufacturer that made them. You must check the owner manual to get the needed information. You will find out which battery your bike is using and which type of charger you’ll require.
4. Remove the battery from the Harley-Davidson bike
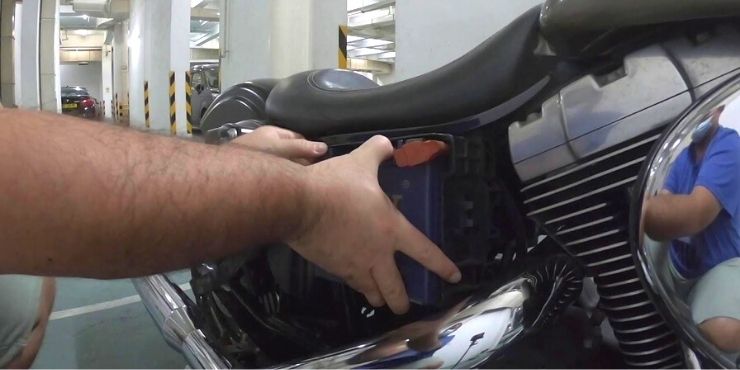
You should avoid leaving the battery inside your bike when charging it. Leaving it inside can potentially damage other components. Generally, for removing the battery, you need to first disconnect the negative cable. Then, remove the positive cable. After that, you should remove the battery from anything connecting it to your bike and lift it out.
Removing the battery from your bike can be a tricky operation. Carefully read the owner manual before you remove the battery. The owner manual will let you know where the battery is located, how you can access it, and more. Each Harley-Davidson bike is different, so you must not forget to read the owner’s manual.
5. Connect the battery charger
You’ll need to attach the battery charger to the battery terminals. Ensure that the battery terminals are connected to the battery charger properly. Once properly connected, you’ll need to plug in the charger. The safest and best way of charging the battery would be in a properly ventilated area. Moreover, you can also carry out outdoors.
The process to charge the battery will create hydrogen gas, which is a highly inflammable substance. Overcharging will produce hydrogen sulfide that will be bad for you. Non-smart chargers should be constantly monitored such that you’re able to ensure that they aren’t overcharging the battery.
6. Check regularly to see if the battery is charged
A smart charger will notify you once the battery is fully charged. For other batteries, you’ll need to perform a voltage test. You will need to disconnect the terminals from the charger. Plugging in the battery will lead to a DVOM, which is also called a multimeter. You should put the black lead into the COM slot, while the red lead will go into the V slot.
Turn the multimeter to the 20V DC section in the scale. Once your motorcycle is completely off, touch the black lead to the negative side of the battery will red lead will go to the positive post. After that, record the voltage.
In case the voltage is measured at 12.73 volts or more, then the battery will be charged and ready to go. Any reading between 12.06V and 12.62V will mean that the battery has to be charged longer. Any reading less than 12.06V means that your battery may be ruined and you should replace it.
Remember not to overcharge the battery. Overcharging must be avoided as the battery could get ruined and will need to be replaced.
7. Install the battery
When the charging is done, simply unplug the charger from your battery. Read the owner manual to find out how you should put the battery back the right way.
Attach the positive cable first before doing the same with the negative cable. Try to restart your Harley-Davidson motorcycle and you’ll see that your bike is working properly again.
How often should you charge your Harley-Davidson battery?
It would be a smart option to charge your Harley-Davidson bike’s battery regularly. Every 30 days or so, you will need to plug in the charger and ensure that it is fully charged. Otherwise, you can even purchase a separate device that keeps your battery charged all the time. A Harley-Davidson bike’s battery will usually deliver its best performance when it is fully charged.
As a rule of thumb, it is recommended that you should charge your battery about once per method when you’re riding it and once or twice per week when your bike is in storage. However, the environment temperature will vary and decide how frequently to charge the battery.
For instance, people in warmer areas should charge the battery once every few days even if it isn’t being used. If you’re storing an old Harley-Davidson bike or a bike that has been sitting for a long time, it’ll be best to have a bike checked out by a professional before you attempt to charge and start it. Charging needs to be done regularly for bikes having ABS systems, as an ABS system will need more energy.

It is always important to charge your Harley-Davidson bike’s battery the right way. It’ll help if you have left it on a trickle charger overnight before you count on it working. A trickle charger keeps the battery from losing its power when sitting and slowly charge the battery without overcharging. While your battery won’t explode, you’ll still need to be careful about the type of charger you’re using. Make sure that you follow all the necessary safety precautions such that you don’t get hurt.
If you’re using a sealed lead-acid or gel cell battery, then it won’t happen as they’re already fully charged when purchasing them from a store. You can even purchase trickle chargers that have an automatic shut-off feature if something goes wrong when charging at night. That way, it’ll be less likely to be problematic unless you are using faulty wiring.
Can you charge your bike’s battery without removing it from the bike?
It isn’t recommended that you should charge your Harley-Davidson bike’s battery with the motorcycle still in a running position. It can easily cause the sulphuric acid to leak out in case there are any cracks or loose connections. This can be extremely dangerous when you’re working with electrical components that have been exposed to acid before the charging. It’ll help if you’re taking extra precautions when you’re doing something like that. This will mean turning off all the electrics first such that you and your bike can stay safe while also letting the charger do its job.
Important safety tips to keep in mind when charging the battery
Maintaining a Harley-Davidson bike’s battery can be easy yet difficult at the same time. You will need to properly take care of it to improve the lifecycle of the battery. Here are some important tips that will help you do that.
- When working with Harley-Davidson motorcycle batteries, you should remember to use eye protection.
- You should never story motorcycle batteries near open flames, cigarettes, or sparks.
- It isn’t advised that you should use the battery when jumpstarting your motorcycle.
- Avoid keeping the battery in a sealed container. Moreover, give the battery adequate ventilation all the time.
- Make sure that you’re using the voltage regulator of the charging system, or get a separate battery charger.
- Regularly monitor the battery and the recharging process.
Conclusion
Thank you for reading. Hopefully, now you know how to charge a Harley-Davidson battery, how often to charge it, and more. Remember that you should regularly charge your bike’s battery after a month. Your Harley-Davidson battery has a ton of pressure on it. It is expected to be maintained by plugging in and charging after a few weeks. The best way to do that would be to charge your battery using a battery charger. Remember that you should monitor the charging and never let the battery overcharge. Otherwise, you will end up ruining the battery and give your bike avoidable issues.

