Maintaining your Harley-Davidson is essential to ensure its longevity and performance. One of the most important aspects of maintenance is knowing when and how often to change the filter of a stage 2 air cleaner. Keeping the filter clean and free of debris is not only important to the overall performance of your Harley-Davidson, but also to your safety as a rider.
Change or clean the Stage 2 air cleaner filter every 5,000 miles, or sooner if riding in dusty or harsh conditions, to maintain airflow and engine performance.
This article will provide you with a comprehensive guide on when and how often you should be changing the filter of a stage 2 air cleaner on your Harley-Davidson. So, if you want to make sure your Harley-Davidson is running at its best, keep reading to find out all you need to know!
Overview of Stage 2 Air Cleaners for Harley-Davidson bikes
Harley-Davidson bikes are synonymous with power and style, and riders are often looking for ways to enhance their motorcycle’s performance. One popular modification that can take their bike’s performance up a level is the installation of Stage 2 Air Cleaners.
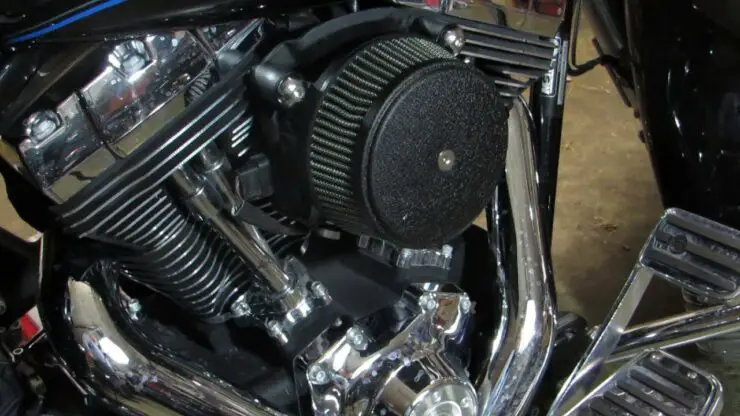
Stage 2 Air Cleaners are aftermarket components designed to replace the stock air intake systems on Harley-Davidson bikes. They are a vital part of Stage 2 performance upgrades, which aim to optimize the motorcycle’s air and fuel delivery for improved horsepower and torque. Stage 2 Air Cleaners are carefully engineered to provide better airflow, improved filtration, and increased performance compared to the stock air intake systems.
A Stage 2 Air Cleaner offers a whole host of benefits. Here are some of the areas that benefit from installing a Stage 2 Air Cleaner –
#1. Airflow
The essence of a Stage 2 Air Cleaner lies in the improvement in the airflow into the engine. Stock air cleaners are designed to meet emission regulations and noise restrictions, which can limit the amount of air the engine can breathe.
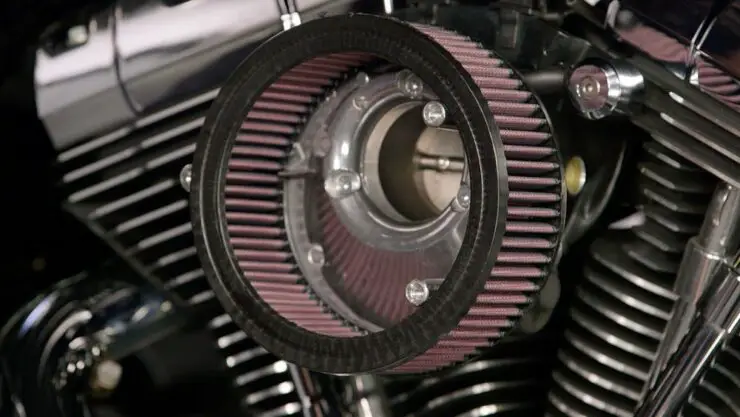
Stage 2 Air Cleaners, on the other hand, feature larger filter elements and less restrictive housings, allowing for increased airflow. This enhanced airflow is important for achieving higher levels of engine performance.
#2. Filtration
Despite the focus on increased airflow, Stage 2 Air Cleaners don’t compromise on filtration. They make use of high-quality filter materials that efficiently trap dust, dirt, and debris while allowing a higher volume of clean air to pass through. This balance between airflow and filtration is important for engine longevity and performance.
#3. Air-to-fuel ratio
Stage 2 Air Cleaners are usually paired with other performance upgrades, like engine tuning and aftermarket exhaust systems. This combination is designed to create a balanced air-to-fuel ratio, ensuring that the engine receives the right amount of oxygen for combustion. As a result, the motorcycle experiences an increase in horsepower and torque, especially in the mid to high RPM range.

#4. Throttle response
The enhanced airflow delivered by Stage 2 Air Cleaners translates into improved throttle response. Riders can expect more immediate and precise control over the bike’s acceleration, making for a more enjoyable and responsive riding experience.
#5. Customization
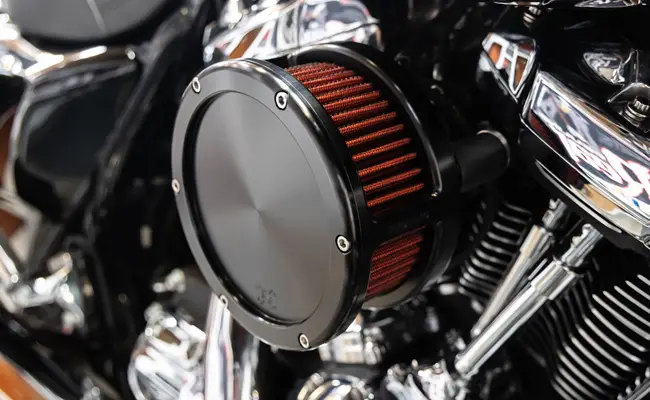
Stage 2 Air Cleaners come in different designs, allowing bikers to customize their motorcycles according to their preferences. These air cleaners often feature unique aesthetics and can be an amazing addition to the overall look of the motorcycle.
#6. Installation
Another benefit of Stage 2 Air Cleaners is their rather straightforward installation process. Many aftermarket manufacturers offer kits that include all the necessary components, making it accessible for riders to upgrade their air intake systems without extensive mechanical expertise.
#7. Engine health
By providing better filtration and reducing the strain on the engine, Stage 2 Air Cleaners can contribute to the long-term health and reliability of the bike’s engine components. Cleaner air and optimized air-fuel ratios reduce the risk of premature wear and tear.
How often should I change the filter of a Stage 2 Air Cleaner on a Harley-Davidson?
You can install a Stage 2 Air Cleaner on your Harley-Davidson and take an already exceptional bike up a level. However, you cannot just install the modification and consider your work done. You should also maintain the air cleaner. When it comes to maintaining and optimizing the performance of your Harley-Davidson bike, proper care of components like Stage 2 Air Cleaners will be important. One of the questions you might have is how often should I change the filter of a Stage 2 Air Cleaner on a Harley-Davidson bike.
Stage 2 Air Cleaners are aftermarket components designed for replacing the stock air intake systems on a Harley-Davidson bike. They are an important part of Stage 2 performance upgrades, aiming to optimize the bike’s air and fuel delivery for improved horsepower and torque. Ideally, it is recommended that you change the filter of your Stage 2 Air Cleaner once every 10,000 to 15,000 miles or every 12 to 18 months. However, to be on the safer side, you should consider filter replacement once every 10,000 miles or 12 months whichever comes first. Moreover, it is important that you inspect the filter regularly and replace it if it is damaged or excessively dirty.
Instead of sticking to a rigid schedule, it is more practical to pay attention to your motorcycle’s performance and the condition of the air filter. For instance, if you notice a decrease in power, sluggish acceleration, or poor throttle response, it might be a sign that your air filter is clogged and in need of replacement.
A clogged air filter can result in a rich air-fuel mixture, resulting in higher fuel consumption. If you find yourself filling up the fuel tank more frequently, it may be time to check the air filter. During routine inspections, if you see that the air filter is visibly dirty or caked with dust or debris, it is a clear indication that it needs attention.
Factors that influence it is time to replace the Stage 2 Air Cleaner
Harley-Davidson bikes are synonymous with power and style, and maintaining optimal performance is important for riders. Stage 2 Air Cleaners are popular upgrades for enhancing a motorcycle’s performance. However, the frequency of Stage 2 Air Cleaner replacement will vary based on different factors. Here are some of the factors that influence when you should consider changing the Stage 2 Air Cleaner in your Harley-Davidson motorcycle.
Riding conditions
The environment in which you ride your Harley-Davidson bike plays a significant role in determining when your Stage 2 Air Cleaner needs replacement. If you frequently ride in dusty or off-road conditions, your air filter might become clogged more quickly. Dust and debris can accumulate in the filter, restricting airflow and reducing performance. In such cases, more frequent air cleaner inspections and replacements might be needed.
Urban environments with high levels of traffic and pollution can contribute to the accumulation of particulate matter in the air filter. If you use your motorcycle for daily commuting in such areas, regular air filter maintenance and potentially more frequent replacements are advisable.
Climate
The climate in your region can also have a major impact on the condition of your air filter and how often it needs to be replaced. In hot and dry climates, dust and fine particles are more prevalent in the air. This can result in faster clogging of the air filter. Riders in these regions need to monitor their air filters closely and be prepared for more frequent replacements.
In humid climates, moisture can combine with dirt and debris to create a sludgy residue on the air filter. Regular inspections and cleaning are important to prevent performance issues in such conditions.
Riding habits
Your riding habits and style will also play a key role in determining air cleaner replacement intervals. Riders who frequently engage in aggressive riding, such as high-speed riding and rapid acceleration, might place more stress on the air filter. Increased airflow demands and exposure to more airborne particles can result in faster clogging.
Long-distance touring can expose your motorcycle to a wide range of environmental conditions. Riders who embark on extended journeys should inspect and clean the air filters more frequently, especially if they encounter varying terrains and climates.
Type of air filter
The type of air filter you’re using can also influence how often should you change it in your Stage 2 Air Cleaner. Some aftermarket air filters are designed to offer maximum airflow and performance but might require more frequent cleaning and replacement. These filters often provide superior performance gains but might need more attention.
Standard replacement filters might have longer service intervals but might not deliver the same level of performance enhancements as high-performance options.
Maintenance practices
Regular maintenance practices, including routine inspection and cleaning, are important for prolonging the life of your Stage 2 Air Cleaner. Maintenance can greatly influence the replacement intervals. You should follow the manufacturer’s recommendations for cleaning and servicing the air filter and be diligent about adhering to a maintenance schedule.
Tools needed for changing the filter in Stage 2 Air Cleaners
Maintaining the Stage 2 Air Cleaner in a Harley-Davidson bike is a rewarding practice. Not only does it improve your bike’s performance but also ensures that your modification works properly for years to come. When it comes to changing or upgrading your Stage 2 Air Cleaner, having the right set of tools on hand is important. Here are some of the important tools and equipment you will need to change the filter in your Stage 2 Air Cleaner.

#1. Screwdrivers
Screwdrivers are indispensable when it comes to removing and installing screws and fasteners on your Harley-Davidson motorcycle. You might require both flathead and Phillips-head screwdrivers for accessing various components of the air cleaner assembly.
#2. Socket set
A socket set having a wide range of metric and standard socket sizes will be important for loosening and tightening nuts and bolts. Make sure that you have the right sizes to fit your specific bike model, as Harley-Davidson motorcycles can vary in their fastener sizes.
#3. Wrenches
A set of open-end and combination wrenches in both metric and standard sizes will be needed to access certain fasteners on your Harley-Davidson motorcycle.
Some bikes also use Allen head bolts, especially in areas like the air cleaner cover and filter housing. Having a set of Allen wrenches or hex keys in various sizes will allow you to remove and install these fasteners.
Some Harley-Davidson models use Torx fasteners, so it’ll be a smart idea to have Torx bits or Torx wrenches on hand. They’re commonly used in the air cleaner and cover assembly.
#4. Pliers
Pliers, such as the needle-nose pliers or slip-joint pliers can be useful for different tasks during the air cleaner replacement process, including gripping and manipulating hoses and clamps.
#5. Ratchet and extension bar
A ratchet and extension bar is handy for accessing tight or hard-to-reach areas when removing or installing components. They work in conjunction with the socket set.
#6. Clean rags and cleaning supplies
Keeping clean rags and cleaning supplies on hand will be important for wiping down components, cleaning surfaces, and ensuring that no contaminants enter the air intake system during the installation.
#7. Safety equipment
You shouldn’t forget to prioritize safety when working on your motorcycle. Safety equipment like safety gloves and safety glasses must be worn to protect your hands and eyes from potential hazards.
#8. Service manual
While not a physical tool, having a service manual for your specific Harley-Davidson bike will be invaluable. It will offer step-by-step instructions and torque specifications for various components, ensuring that you follow proper procedures during the filter-changing process.
How to change the filter in Stage 2 Air Cleaner for your Harley-Davidson bike
Enhancing the performance of your Harley-Davidson bike with a Stage 2 Air Cleaner is an exciting upgrade. You will need to carry out proper maintenance but at times, you will have no choice but to change the filter in your Stage 2 Air Cleaner. To ensure proper installation and maximize the benefits of improved airflow, it’ll be important to follow the right steps. Here are the steps you need to follow for changing the filter in Stage 2 Air Cleaner for your Harley-Davidson motorcycle.
Step 1: Disconnect the air cleaner
First, you need to find a flat, stable surface to park your Harley-Davidson motorcycle. Make sure that it is a well-ventilated area with adequate lighting. Before you start any work, turn off the engine and allow it to cool down to prevent burns or injuries.
The air cleaner cover is typically located on the side of the motorcycle, often beneath the seat or on the side of the gas tank. Use the appropriate tools to remove any screws or fasteners securing the cover. Then, lift the air cleaner cover beneath it. Set the cover aside in a safe place.
Step 2: Remove the air filter
Once you have removed the air cleaner cover, inspect the air filter housing for any visible signs of dirt or debris. Use a clean rag or compressed air for removing loose particles. Depending on your Harley-Davidson model, there might be hose clamps securing the air filter assembly. Make use of pliers or a socket set to loosen these clamps and disconnect the hoses connected to the air filter.
Lift the air filter out of its housing. This might require gently rocking it back and forth to release it. Be mindful that you don’t damage any hoses or electrical connections during this step.

Step 3: Inspect the air intake
With the air cleaner assembly removed, you should inspect the air intake area for any accumulated dirt, debris, or obstructions. Clean the intake if needed using a clean rag or a soft brush.
Step 4: Install the new filter
Make sure that you have the correct air filter for your Harley-Davidson model. Remove it from its packaging while being careful that you don’t damage the filter element.
Place the new air filter into the air filter housing, making sure that it aligns properly with the intake. If you disconnected any hoses or clamps earlier, you should reattach them securely. Make sure that there are no loose or disconnected components.
Step 5: Reattach the air cleaner
Slide the air cleaner assembly back into its housing, ensuring that it fits snugly. If your motorcycle uses hose clamps, tighten them securely to prevent any air leaks.
Before you reattach the air cleaner cover, inspect it for cleanliness. If it is dirty, clean it using a soft cloth or compressed air. Carefully position the air cleaner cover over the assembly and then secure it in place using the appropriate screws or fasteners.
Common issues with Stage 2 Air Cleaners and how to troubleshoot them
Harley-Davidson bikes are extremely stylish and powerful on their own. To enhance the performance, many riders look to install Stage 2 Air Cleaners. However, like any other motorcycle accessory, Stage 2 Air Cleaners can experience issues that affect overall performance. Here are some of the common problems associated with Stage 2 Air Cleaners in Harley-Davidson bikes and how to troubleshoot them.
Leaking air cleaner
If you notice a leaking air cleaner, it is important to address it promptly. Air leaks can result in a lean air-fuel mixture, which can cause poor engine performance, stalling, and other issues.
For troubleshooting this issue, you must carefully examine the seals and gaskets around the air cleaner assembly. Look for signs of damage, wear, or misalignment. Replace any damaged or worn seals.
Make sure that all hose clamps, bolts, and fasteners connecting the air cleaner are properly tightened. Loose connections can result in air leaks. Inspect the air cleaner for any cracks or damage that might allow air to escape. If you find any, you should consider replacing the housing.
Poor performance
Poor performance can manifest as reduced power, sluggish acceleration, and decreased throttle response. This totally defeats the purpose of upgrading to a Stage 2 Air Cleaner.
For troubleshooting this issue, you must remove the air cleaner cover and inspect the air filter for any dirt, debris, and clogs. A dirty filter can often restrict airflow and cause poor performance. If needed, you should clean or replace the air filter.
Air leaks can result in poor performance. You should reinspect all seals, gaskets, hose clamps, and fasteners for ensuring there are no leaks.
If your motorcycle has undergone significant modifications, it might require tuning adjustments. You should consult a professional tuner for ensuring that the air-fuel mixture is optimized for the setup.
Dirty filter
A dirty air filter can compromise performance and engine health as it might no longer effectively filter out contaminants, potentially allowing them to enter the engine.
To fix this issue, you must maintain a regular cleaning and maintenance schedule for the Stage 2 Air Cleaner. Follow the manufacturer’s recommendations for cleaning products and intervals.
Eventually, even with proper cleaning and maintenance, the air filter will require replacement. If you notice that cleaning is no longer restoring its performance, replace the air filter following manufacturer recommendations. Use appropriate cleaning products and make sure that the filter is completely dry before reinstallation.
FAQs
What type of filter should I use for a stage 2 air cleaner on a Harley-Davidson?
For a stage 2 air cleaner on a Harley-Davidson, you should use a high-performance air filter that is designed specifically for high-performance motorcycles. This type of filter will help provide optimal airflow and performance for your engine.
How often should I change the filter of a stage 2 air cleaner on a Harley-Davidson?
It is recommended to change the filter of a stage 2 air cleaner on a Harley-Davidson every 10,000 to 15,000 miles or every 12 to 18 months. It is also important to inspect the filter regularly and replace it if it is damaged or excessively dirty.
What happens if I don’t change the filter of a stage 2 air cleaner on a Harley-Davidson regularly?
If you don’t change the filter of a stage 2 air cleaner on a Harley-Davidson regularly, it can cause a buildup of dirt and debris which can lead to decreased performance and engine damage. This can also lead to increased fuel consumption and emissions. Regular maintenance of the filter is important to ensure optimal performance and prevent damage to your engine.
>>> Read more about Stage 2 Air Cleaner for Harley-Davidson <<<

