Installing a stage 2 air cleaner on a Harley-Davidson is no small task, and it is important to have all the right tools to do the job effectively and safely. Whether you are a novice or an experienced mechanic, you may be wondering what special tools are necessary to install a stage 2 air cleaner.
Installation typically requires basic tools like a socket set, hex keys, and a torque wrench. Some kits may need a specialized backing plate wrench, depending on the model.
In this article, we will answer this question and provide helpful advice for completing the job properly. So, if you are looking for information on installing a stage 2 air cleaner on your Harley-Davidson, you have come to the right place! Read on to find out more.
What are Stage 2 Air Cleaners?
Harley-Davidson bikes have earned a legendary reputation for their design, style, and powerful performance. One of the underrated components that influence the motorcycle’s performance is the air intake system. Stage 2 Air Cleaners are a popular aftermarket modification in the market. This addition can improve your bike’s airflow, boost horsepower, and enhance overall engine performance.
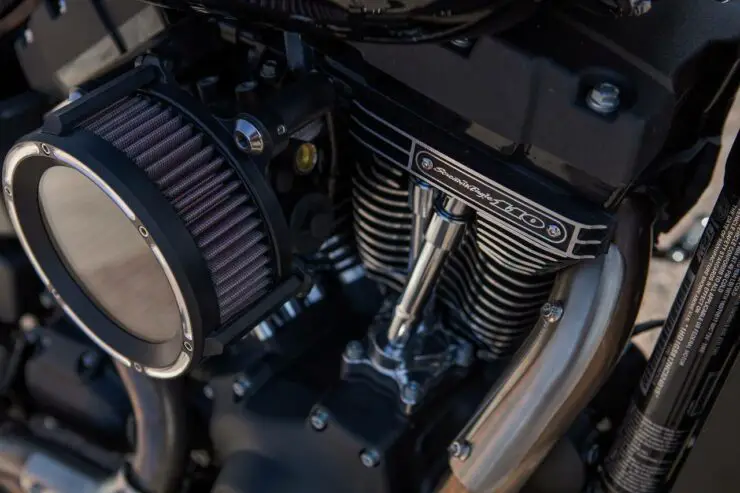
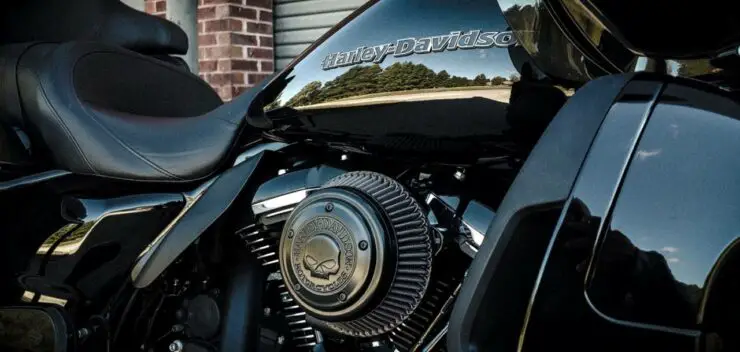
Stage 2 Air Cleaners are high-performance aftermarket air intake systems specifically designed for Harley-Davidson motorcycles. They are the second stage of air intake upgrades after Stage 1 modifications. This upgrade includes an aftermarket exhaust system and a fuel management system like a fuel tuner or remap.
The primary purpose of a Stage 2 Air Cleaner is to optimize the airflow into the engine, ensuring that it receives a consistent and clean air supply. This improved air intake enhances the combustion process, which results in more efficient fuel burning and increased horsepower and torque.
Installing a Stage 2 Air Cleaner will typically require some level of mechanical skills and might necessitate adjustments to your bike’s fuel management system to optimize the air-fuel ratio. Riders must also ensure that the chosen air cleaner is compatible with their specific Harley-Davidson model and engine.
Benefits of Stage 2 Air Cleaners
Harley-Davidson riders are always looking to enhance their Harley-Davidson experience. To do that, they often turn to modifications and aftermarket upgrades. One of the routes they go for is the installation of Stage 2 Air Cleaners. These high-performance aftermarket air intake systems offer a wide range of benefits that can elevate your bike’s performance and overall riding experience. Here are some of the benefits of installing Stage 2 Air Cleaners on Harley-Davidson motorcycles.
#1. Substantial increase in horsepower
One of the most significant benefits of installing a Stage 2 Air Cleaner is the substantial increase in horsepower and torque. By optimizing the airflow into the engine, Stage 2 Air Cleaners allow the engine to breathe more efficiently. This results in improved combustion and a significant boost in power, allowing your Harley-Davidson bike to accelerate faster and handle challenging riding conditions with ease.
#2. Better throttle response
Harley-Davidson riders know that the thrill of the open road comes from the feeling of control and power at their fingertips. Stage 2 Air Cleaners enhance throttle response, making it sharper and more immediate. This improvement is especially noticeable in lower to medium RPM ranges, where quick acceleration is important.
#3. Enhanced engine efficiency
Stage 2 Air Cleaners contribute to better engine efficiency by reducing airflow restrictions. This increased efficiency means that your bike’s engine operates more effectively, translating to better fuel mileage in certain riding situations. This is a more valuable benefit for riders who want both power and fuel economy.
#4. Distinctive sound enhancement
The distinct Harley-Davidson rumble is music to the ears of most riders. A Stage 2 Air Cleaner can greatly amplify this signature sound, making your motorcycle’s exhaust note more robust and distinctive. This enhancement in sound adds to the overall riding experience, providing an exhilarating auditory sensation.
#5. Style and customization
Stage 2 Air Cleaners are available in a wide variety of shapes, designs, and finishes. This customization will allow riders to not only improve performance but also personalize the appearance of their Harley-Davidson. These air cleaners can be visually striking additions to your bike, reflecting your unique style.
#6. Compatibility with other upgrades
Harley-Davidson enthusiasts often pursue multiple performance upgrades for their bikes. Stage 2 Air Cleaners are typically part of a broader performance enhancement package. They work seamlessly with other modifications such as aftermarket exhaust systems and fuel management devices, creating a comprehensive improvement in your bike’s performance.
#7. Long-term investment
Stage 2 Air Cleaners are a long-term investment in your bike’s performance and enjoyment. While there is an initial cost associated with the purchase and installation, the benefits you gain from increased power, improved efficiency, and an enhanced riding experience will be well worth it over time.

Are there any special tools needed to install a Stage 2 Air Cleaner on a Harley-Davidson?
Upgrading your Harley-Davidson motorcycle with a Stage 2 Air Cleaner can greatly improve its performance and enhance your riding experience. This essential modification will allow your motorcycle’s engine to breathe more efficiently, resulting in increased power and throttle. However, before installing the Stage 2 Air Cleaner, you will want to know the right method of installation.
Moreover, you will also wonder are there any special tools needed to install a Stage 2 Air Cleaner on a Harley-Davidson bike. The situation isn’t that complex and is easier than you think. There is a set of basic tools you will need to help you install the Stage 2 Air Cleaner. Here are some of the tools you will need to install a Stage 2 Air Cleaner on your Harley-Davidson bike.
#1. Socket set
A quality socket set with various socket sizes will be a fundamental tool for any mechanic task. You will also need sockets to loosen and tighten bolts and nuts throughout the installation process. Make sure that you’ve got a range of metric and standard socket sizes to accommodate different fasteners on your Harley-Davidson bike.
#2. Wrenches
Combination wrenches are important for accessing tight spaces and providing leverage. They come in both metric and standard sizes, so having a complete set of wrenches will ensure you’re able to tackle any bolt or nut during the installation.
#3. Screwdrivers
A set of both flathead and Phillips-head screwdrivers is indispensable for removing and securing screws or bolts on your Harley-Davidson bike. You might also encounter Torx screws, so having a set of Torx screwdrivers will be beneficial.
#4. Torque wrench
Proper torque specification will be important when securing components on your motorcycle to avoid over-tightening or under-tightening. A torque wrench will ensure that you’re able to achieve the correct torque values specified in your Harley-Davidson bike’s service manual.
#5. Pliers
Pliers, such as needle-nose and slip-joint pliers, can help grip, bend, or twist various components during the installation process. They’re versatile tools that come in handy for a variety of tasks.
#6. Allen/Hex keys
Many Harley-Davidson motorcycles use hex bolts or screws for specific components. A set of Allen or Hex keys will ensure that you’ve got the right tool for these fasteners, providing precision and control during installation.
#7. Adjustable wrench
An adjustable wrench or a crescent wrench can be useful for gripping and turning various-sized nuts and bolts that might not fit your standard wrenches or sockets.
#8. Safety equipment
Safety must always be a top priority when working on your bike. Make sure that you have safety glasses, gloves, and appropriate protective gear to protect yourself when installing a Stage 2 Air Cleaner.
#9. Your bike’s service manual
While not necessarily a tool, having the service manual for your specific Harley-Davidson bike model will be invaluable. It provides step-by-step instructions, torque specifications, and other essential information to guide you through the installation process accurately.
#10. Workbench or bike stand
Having a stable and secure workbench or a bike stand will be important for elevating your Harley-Davidson bike off the ground. It will allow easy access to components for installation. This will make the process safer and more convenient.

How to remove the stock air cleaner from your Harley-Davidson bike
Installing a Stage 2 Air Cleaner on your Harley-Davidson bike can greatly improve its performance and breathing capacity. Once you have gathered the tools, you’re in a position to install the new air cleaner. However, before you can unleash the extra power and enhanced throttle response, you’ll first need to remove the stock air cleaner from your Harley-Davidson bike.
Here are the steps you will need to follow to safely and effectively remove the stock air cleaner from your Harley-Davidson bike, making way for the upgrade to be installed.
Step 1: Disconnect the battery
To prevent any accidental electrical mishaps, disconnect the battery by removing the negative (black) terminal first. Then, you should do the same for the positive (red) terminal. Set the disconnected cables aside in a safe location.
Step 2: Access the air cleaner
Locate the stock air cleaner on your Harley-Davidson bike. It is typically housed in a conspicuous location on your bike, such as beneath the fuel tank or the side of the engine. The exact location might vary depending on your bike’s model and year.
Step 3: Remove the air cleaner cover
Using the appropriate tools like a socket set, carefully remove any screws, nuts, or bolts securing the air cleaner cover in place. Once the fasteners have been removed, gently lift the cover off to expose the air filter beneath.
Step 4: Remove the air filter element
Look for the air filter element present inside the air cleaner housing. Depending on your bike’s model, you might have to release clamps, screws, or tabs that secure the air filter element. You should carefully pull out the air filter element. Be extremely cautious that you don’t end up damaging it as it might be reusable or serve as a reference for the size of the new Stage 2 Air Cleaner.
Step 5: Disconnect the necessary hoses or sensors
Depending on your motorcycle’s configuration, there might be hoses or sensors connected to the stock air cleaner. Disconnect them carefully, noting their positions for reinstallation if needed.
Step 6: Remove the backplate
Locate the backplate that connects the air cleaner to the carburetor or throttle body. Make use of the appropriate tools to loosen and remove any bolts or clamps securing the backplate. Carefully detach the backplate from the carburetor or throttle body.
Before you proceed with the installation, take a moment to inspect the exposed intake area for any debris or dirt. Clean the area as needed to ensure a clean and smooth transition for the new air cleaner.
How to install Stage 2 Air Cleaners on Harley-Davidson bikes
Once you have gathered the tools and equipment and removed the stock air cleaner, you’ll be in an ideal position to install the new Stage 2 Air Cleaner on your Harley-Davidson bike. Here are the steps you’ll need to follow to install a Stage 2 Air Cleaner on your Harley-Davidson bike.
Step 1: Install support bracket
The support bracket is the foundation for your Stage 2 Air Cleaner. It will secure the air cleaner in place and ensure stability. Start by locating the support bracket in your Stage 2 Air Cleaner kit.
Position the support bracket as per your Harley-Davidson model and the kit’s instructions. It needs to align with the mounting points on your bike. Using the appropriate tools, such as a socket set or torque wrench, tighten the support bracket securely. Make sure that it is firmly attached to your motorcycle’s frame or designated mounting points.
Step 2: Install the base plate
The base plate will serve as the mounting platform for your air filter element and is an important part of the Stage 2 Air Cleaner assembly. Locate the base plate included in the kit. Attach the base plate to the support bracket you installed earlier.
Align it carefully to ensure a secure fit. Use the provided fasteners and the appropriate tools to firmly attach the base plate to the support bracket. Make sure that it is tightly secured but not over-tightened as it can damage the components.
Step 3: Install the air filter
The air filter is the heart of your Stage 2 Air Cleaner, responsible for providing clean and unrestricted airflow to your motorcycle’s engine. Carefully remove the air filter element from its packaging.
Place the air filter onto the base plate you installed earlier. Make sure that it aligns with the designated openings on the base plate. Depending on your specific air filter design, secure it in place using the provided clamps, screws, or fasteners. make sure that it is snugly fitted.
Step 4: Install support cover
The support cover shields your air filter from debris and enhances the overall appearance of your Stage 2 Air Cleaner. Locate the support cover included in the air cleaner kit. Position the support cover over the air filter and base plate.
Make sure that it aligns with the mounting holes or brackets. Secure the support cover in place using the provided fasteners. Use the appropriate tools for tightening the screws, nuts, or clamps securely.
Step 5: Install air cleaner cover
The air cleaner cover will not only protect the air filter but also add a personalized touch to your bike’s appearance. Retrieve the air cleaner cover from your Stage 2 Air Cleaner kit. Carefully place the air cleaner cover over the support cover and air filter assembly.
Make sure that it aligns with the corresponding mounting points. Secure the air cleaner cover in place by using the supplied fasteners, such as screws or bolts, along with the appropriate tools. Be cautious that you don’t overtighten as it could damage the cover or base plate.

Tips to maintain your newly installed Stage 2 Air Cleaner
Stage 2 Air Cleaners are a popular performance upgrade for your Harley-Davidson bikes, providing increased power, improved airflow, and better throttle response. However, like any other motorcycle component, regular maintenance of your Stage 2 Air Cleaner will be important to ensure it continues to perform at its best. Here are some of the tips that you need to keep in mind as they will help you maintain the Stage 2 Air Cleaner on your Harley-Davidson bike.
#1. Regular inspection
You must regularly inspect your Stage 2 Air Cleaner. Always look for any signs of damage, loose fasteners, or wear and tear. Catching issues early on can prevent more extensive problems down the road.
#2. Clean the air filter
If your Stage 2 Air Cleaner makes use of a reusable air filter, you must follow a series of steps for cleaning. You should start by gently tapping the air filter to remove loose dirt and debris. Make use of a soft-bristle brush to carefully clean away the remaining dirt.
If needed, use a cleaning solution recommended by the air filter manufacturer. Follow the manufacturer’s instructions for cleaning. Rinse the air filter thoroughly with clean, lukewarm water. Allow the air filter to air dry completely before reinstalling it.
#3. Inspect the base plate and support bracket
While the air filter is drying, inspect the base plate and support bracket. Check for any signs of damage, loose fasteners, or misalignment. Make sure that they are securely attached to your motorcycle’s frame.
#4. Torque check
Periodically check the torque on the fasteners securing the Stage 2 Air Cleaner components, including the air cleaner cover and base plate. Make sure that they are properly tightened to prevent vibrations or loosening during rides.
#5. Replace the air filter when needed
If your air filter isn’t reusable or shows signs of significant wear, such as tears or excessive dirt buildup, it’ll be time to replace it. Always use a high-quality replacement air filter recommended for your Stage 2 Air Cleaner kit.
#6. Regularly check for air leaks
Inspect the seals and gaskets around the air cleaner assembly for signs of wear or damage. Air leaks can result in reduced performance and should be addressed promptly.
#7. Follow the manufacturer’s instructions
Always follow the maintenance guidelines and recommendations provided by the manufacturer of your Stage 2 Air Cleaner kit. These instructions are specific to your air cleaner kit and bike model and should be your primary reference for maintenance.
#8. Keep records
Maintain a thorough maintenance log or record of when you perform maintenance tasks on your Stage 2 Air Cleaner. You must note the date, type of maintenance performed, and any observations or issues you encountered. This log can help you track the history of your air cleaner’s maintenance and identify patterns or trends.
FAQs
What are the tools required for installing a stage 2 air cleaner on a Harley-Davidson?
Installing a stage 2 air cleaner on a Harley-Davidson requires a few basic tools, including a socket wrench, Phillips screwdriver, flathead screwdriver, and pliers. You may also need a torque wrench if you plan to adjust the air cleaner’s mounting screws.
What is the importance of a stage 2 air cleaner?
A stage 2 air cleaner is designed to increase air intake and improve engine performance. It is an ideal upgrade for Harley-Davidson motorcycles with modified engines and can help to increase horsepower and torque.
Are there any safety precautions I should take when installing a stage 2 air cleaner?
It is important to take safety precautions when installing a stage 2 air cleaner. Make sure the bike is properly supported, the engine is cooled down, and that the battery is disconnected before you begin the installation. Additionally, follow the instructions provided with the air cleaner and make sure to wear protective gear, such as safety glasses and gloves.
>>> Read more about Stage 2 Air Cleaner for Harley-Davidson <<<

