If you’re a motorcycle enthusiast who loves to customize and maintain their ride, you know just how tricky it can be to work on a Street Glide fairing. But, don’t worry! This step-by-step guide will walk you through the entire process and have you on the road in no time. So, get ready to take the fairing off your Street Glide and get ready to customize your ride like never!
Overview of fairing on Harley-Davidson Street Glide
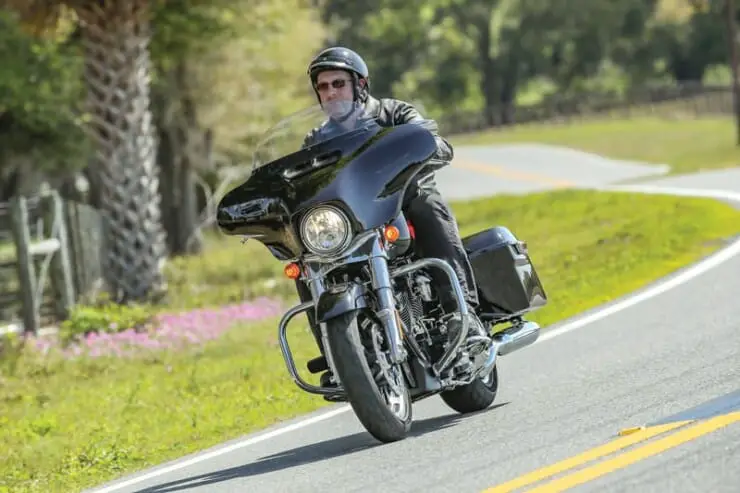
The Harley-Davidson Street Glide is a popular motorcycle model that has gained a fair bit of attention from riders thanks to its sleek design and amazing features. One of the most notable features of the Harley-Davidson Street Glide is its fairing. The fairing is designed for providing protection from wind and other elements while riding.
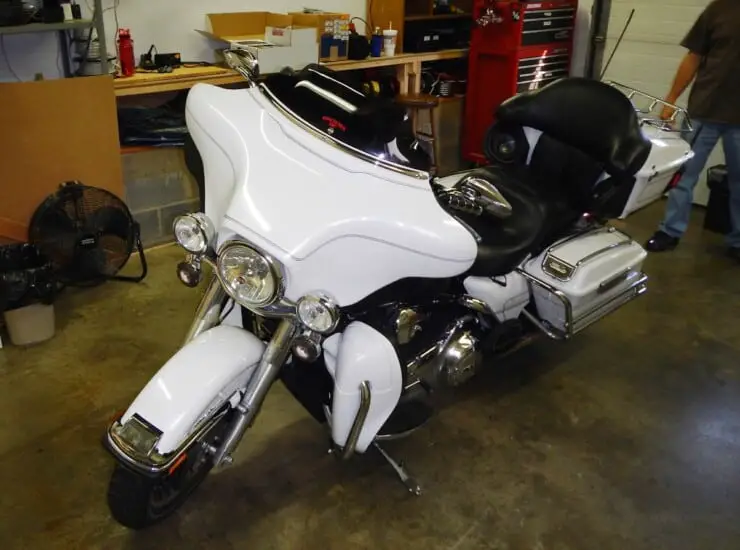
The fairing on a Harley-Davidson Street Glide is a large windshield-like structure attached to the front of the bike. It is designed for providing protection from the wind, rain, and other external elements. Fairings help make the riding experience much more comfortable and enjoyable. The fairings also come equipped with speakers and other electronic components, which make it an important part of the motorcycle’s audio system.
One of the primary benefits of the Street Glide fairing is its ability to reduce wind resistance while riding. This makes it much easier for the biker to maintain a stable, comfortable riding position even at high speeds. The fairing will also help in reducing the amount of wind noise that the rider is exposed to, making it much easier to help the bike’s audio system and other important sounds.

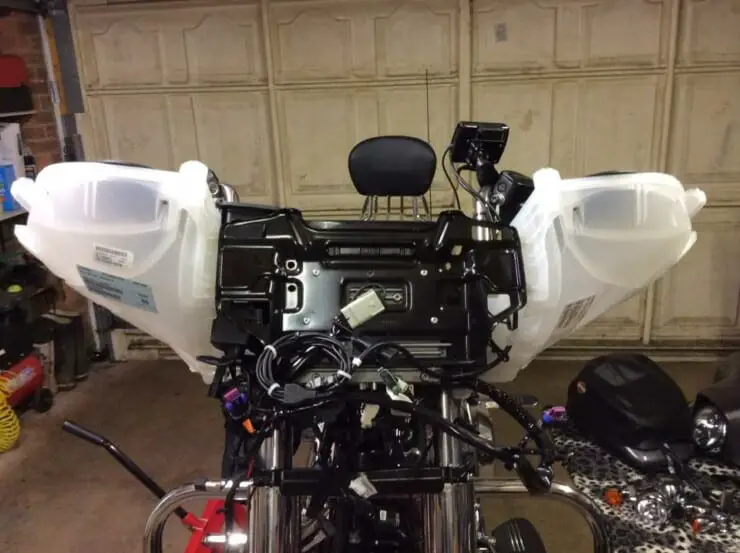
Another important feature of the Street Glide fairing will be its electronic components. The fairing also comes equipped with a high-quality audio system, which includes speakers and a stereo receiver. This allows the biker to listen to their favorite music artists while riding, making the experience much more enjoyable and entertaining. The fairing will also include other electronic components, such as GPS navigation systems and other digital displays, which provide key information to the rider while on the road.
The Street Glide fairing is available in a wide variety of different sizes and styles, allowing the bikers to choose the one that best suits their needs and preferences. Some fairings are also designed for maximum wind protection, whereas others are more streamlined and designed for a sportier look. Moreover, bikers can also choose from a variety of different materials like plastic or fiberglass, depending on their personal preferences and budget.
Factors to consider when selecting a set of fairings for your Street Glide
When you remove the Street Glide Fairing, you will either want to fix it and put it back or replace it with a new one. Investing in a quality fairing set will be worthwhile as it’ll boost your motorcycle’s aesthetics and functionality. A great pair of Street Glide fairings will enhance your riding experience. When you’re replacing the fairing, there are certain factors to consider. Here are some of the things that you should keep in mind –
#1. Model of motorcycle
The model of your Street Glide can greatly affect the type of fairing you need. Not all fairings are created equal, and some might even need modifications to fit your bike. Before you purchase a fairing, it will be important to find out if it is compatible with the model of your bike.
#2. How often you ride on the highway
Knowing how often you’ll be riding on the highway will help you decide if wind-deflecting fairings are well worth the investment. You might want to consider something that protects you from road debris and insects if you frequently ride around the city.
#3. Your taste
It is important to have an idea of what you prefer. While some bikers like their fairings to be custom-made to their liking, others might choose to save some money by buying fairings online or from a local dealership. If you’re looking to save money, you can also purchase second-hand motorcycle components.
#4. Budget
As with anything else, your budget will be an important factor to consider when buying fairings for your Street Glide. You should ensure that you budget enough to purchase the correct fairings for your purposes.
Tools and materials needed for removing a Street Glide fairing
Removing the fairing from a Harley-Davidson Street Glide can be a somewhat daunting task but with the right tools and materials, it can be done with ease. Here are some of the tools and materials you will need for removing the Street Glide fairing –
- A socket set – A socket set will be essential for removing the bolts and screws holding the fairing in place, so ensure that you have a socket set that includes both metric and standard sizes as different parts of the bike might need different sizes
- A hex key set – A hex key set will be important for removing these bolts, as they’ll need a specialized tool that fits precisely into the bolt heads
- A Torx key set – A torx key set will include a range of sizes that allow you to remove these bolts with ease
- Pliers – Pliers are useful for gripping and holding on to small parts like washers and nuts while you’re removing screws and bolts
- Screwdrivers – You’ll require flathead and Phillips screwdrivers for removing various screws and bolts on the fairing
- Floor jack – A floor jack will be useful for lifting the front of the Street Glide to give you easy access to the fairing, so ensure that you use jack stands for ensuring that the bike is safely supported while you’re working
- Ratchet straps – Ratchet straps can be used for securing the fairing and prevent it from falling off the bike while you’re removing it
- Plastic trim removal tools – Plastic trim removal tools can be quite useful for removing the plastic clips or fasteners that are holding the fairing in place
- Towels or blankets – It’ll be a smart idea to have a few towels or blankets on hand to protect your bike’s paint and finish while you work
Safety gear needed when removing a Street Glide fairing
When removing the fairing from a Harley-Davidson Street Glide, it’ll be important to prioritize safety. This involves wearing the appropriate safety gear to protect yourself from potential hazards and injuries. Here is the safety gear needed when removing a Street Glide fairing –
#1. Eye protection
Eye protection will be important when working on a Street Glide, as debris could end up flying into your eyes. Safety goggles or glasses must be worn to protect your eyes from dirt, dust, and other debris that might be kicked up during the fairing removal process.
#2. Gloves
Work gloves are needed when working with hand tools or when handling hot or sharp objects. They’ll protect your hands from cuts, burns, and abrasions and provide a better grip when handling tools or parts.
#3. Protective boots
Sturdy work boots with steel toes and slip-resistant soles will be needed when working on a Street Glide. They will protect your feet from crushing injuries and from slipping on slick or oily surfaces.
#4. Ear protection
Loud noises from the Street Glide or power tools can result in permanent hearing damage. Noise-canceling headphones or ear plug must be worn to protect your ears from excessive noise.
#5. Protective clothing
Long pants can offer protection against cuts, scrapes, and burns that might occur while working on a bike. They’ll also help in preventing skin irritation and exposure to chemicals or solvents.
In addition to boots and pants, other protective clothing like a heavy-duty apron or coveralls might be needed for protecting your clothing from grease, oil, or other fluids.
#6. First aid kit
Accidents can happen anytime, and having a first aid kit on hand will help you treat minor injuries quickly and efficiently. You should ensure that you include items like bandages, pain relievers, and antiseptic wipes in your first aid kit.
Preparation when removing a Street Glide fairing
Preparing to remove the fairing from a Harley-Davidson Street Glide will be an important step in ensuring a smooth and successful process. Proper preparation will save you a lot of time and effort, while also helping you prevent damage to your Street Glide. With better preparation, you will be better prepared to remove the fairing.
#1. Identify different parts of the fairing
Take time to identify the different parts of the fairing and how they’re attached to the motorcycle. This will help you better understand the process of removing the fairing. Moreover, it’ll also make it much easier to reassemble the bike once the fairing has been removed.
#2. Plan work area
You will want a clear and well-lit space to work on your bike. You should choose an area that is free from any clutter and has ample space to accommodate the bike and any tools or equipment that you’ll need. Further, lay out a towel or blanket for protecting the bike’s finish.
#3. Disconnect the battery
Before you start working on any electrical component of your Street Glide, it’ll be important to disconnect the battery. This will help prevent accidental electrical shocks and damage to the bike’s electrical system.
#4. Remove any accessories or components that might interfere
If there are any accessories or components that might interfere with the fairing removal process, like a windshield or crash bars, you should remove them before starting the removal.

#5. Take photos for reference
Taking photos of your Street Glide fairing before and during the fairing removal process can be quite helpful when it comes time to reassemble the bike. It can also serve as a reference if any issues arise during the process.
#6. Label parts
As you’re removing each part of the fairing, label it or place it in a specific area to make sure that you can easily locate it when it is time to reassemble the bike.
How to remove Street Glide fairing
Removing the fairing from your Harley-Davidson Street Glide could seem like a daunting task, especially if you’re a novice biker. However, with the right tools and preparation, it can be a rather straightforward process. Here, you will get to know the step-by-step instructions involved with removing Street Glide fairing –
Removing the headlight
The steps to remove the headlight on your Harley-Davidson Street Glide include –
- Remove the outer trim ring as well as the headlight retaining ring
- Carefully disconnect the headlight from the electrical connector
- Now, gently pull the headlight out of the fairing
Removing the wiring cover
The steps to remove the wiring cover on your Harley-Davidson Street Glide include –
- Remove the screws that are holding down the wiring cover in place
- Now, carefully pull the wiring cover off of the fairing
Removing the firing and support bolts
The steps to remove the firing and support bolts on your Harley-Davidson Street Glide include –
- Use a T-27 Torx bit for removing the two firing bolts that secure the fairing to the frame
- Use a T-45 Torx bit for removing the four support bolts that attach the fairing to the brackets
- Place a blanket or towel over the front fender for protecting it from accidental scratches
Disconnecting the connectors
The steps to remove the connectors on your Harley-Davidson Street Glide include –
- Carefully disconnect the turn signal and running light connectors from the fairing
- Disconnect the radio and CB antenna connectors if they are present
- Lastly, unplug any additional connectors that might be attached to the fairing
Removing the mirror
The steps to remove the mirror on your Harley-Davidson Street Glide include –
- Remove the two screws that are holding the mirror in place
- Slide the mirror off of the fairing carefully

Remove the fairing
The steps to remove the firing and support bolts on your Harley-Davidson Street Glide include –
- Lift the fairing off of your Street Glide
- Make sure that you’ve got a helper to assist you with removing the fairing to prevent any accidental damage
- Place the fairing on a clean, flat surface, ensuring that you protect the painted surfaces
How to reinstall Street Glide fairing
Reinstalling the fairing on your Harley-Davidson Street Glide will be just as important as removing the fairing. Proper installation will ensure that your bike is safe and functional, and it can also help in preventing any potential damage during future rides. Here are the step-by-step instructions for reinstalling the Street Glide fairing –
Reinstalling the mirror
The steps to reinstalling the mirror on your Harley-Davidson Street Glide include –
- Place the mirror back onto the fairing before securing it with the two screws
- Tighten the screws with the help of a screwdriver, but be careful that you don’t overtighten them
Reinstalling the connectors
The steps to remove the firing and support bolts on your Harley-Davidson Street Glide include –
- Connect the turn signal and run light connectors back onto the fairing
- Then, reconnect the radio and CB antenna connectors if they are present
- Plug in additional connectors that were disconnected during the fairing removal process
Reinstalling the support bolts
The steps to remove the firing and support bolts on your Harley-Davidson Street Glide include –
- Carefully align the fairing with the brackets
- Use a T-45 Torx bit for reinstalling the four support bolts
- Tighten the bolts firmly, but remember not to overtighten them
Reinstalling the fairing
- Make sure that you’ve got a helper to assist you with placing the fairing back onto your bike
- Carefully align the fairing with the motorcycle frame and brackets
- Then, lower the firing into place and check that it is properly seated
Reinstalling the wiring cover
The steps to remove the firing and support bolts on your Harley-Davidson Street Glide include –
- Align the wiring cover with the fairing
- Reinstall the screws and tighten them until the cover is secure
Reinstalling the headlight
The steps to remove the firing and support bolts on your Harley-Davidson Street Glide include –
- Slide the headlight back into the fairing carefully
- Then, reconnect the headlight to the electrical connector
- Install the remaining ring and the outer trim ring
- Lastly, tighten the rings until they are secure but don’t overtighten them
Troubleshooting the problems when removing a Street Glide
When removing a Street Glide fairing, it’ll be important that you’re aware of potential issues that may arise with the headlight, fairing, wiring cover, etc. Here are some of the problems that might arise and how to troubleshoot them –
Possible issues with the headlight
One of the most common problems with the headlight is misalignment. This can potentially occur if the headlight wasn’t seated properly in the fairing or if the retaining ring was overtightened during the removal process. For troubleshooting this issue, you should carefully reposition the headlight and check that it is aligned properly with the fairing. If needed, you should adjust the retaining and ensure that it is tightened enough to hold the headlight in place without causing misalignment.
Possible issues with the wiring cover
The wiring cover is sometimes prone to cracking or breaking if mishandled during removal. If you notice any damage to the wiring cover, it’ll have to be replaced. For troubleshooting this issue, you must carefully inspect the cover for any signs of damage before attempting to reinstall it. If it appears to be damaged, you should purchase a replacement cover and install it carefully to avoid further damage.
Possible issues with the fairing
One of the possible issues with the fairing is scratches or scuffs that may occur during removal or handling. If you notice any damage to the fairing, it might have to be repainted or replaced. For troubleshooting this issue, you must carefully inspect the fairing for potential signs of damage before attempting to install it. If it appears to be damaged, you should consider taking it to a professional for repair or replacement.
Possible issues with the support bolts
The support bolts can become damaged or stripped during removal, especially if they are overtightened. For troubleshooting this issue, you should inspect the support bolts carefully for any signs of damage or wear or tear before you attempt to reinstall them. If they appear to be damaged, you should purchase replacements and install them carefully for avoiding causing further damage.
Possible issues with the connectors
The connectors can become damaged or disconnected during removal, especially if they are mishandled. For troubleshooting this issue, you should carefully inspect the connectors for signs of damage or wear before attempting to reinstall them. If they appear to be damaged, you should consider purchasing replacement connectors and installing them carefully to avoid causing further damage.
Possible issues with the mirror
The mirror can become damaged or scratched during removal or handling. For troubleshooting this issue, you must carefully inspect the mirror for signs of damage before you try to reinstall it. If it appears to be damaged, you should consider buying a replacement mirror and installing it carefully to avoid causing further damage.
FAQs
What tools are required to remove a Street Glide fairing?
You will need a basic set of tools to remove a Street Glide fairing, including a Phillips head screwdriver, a flat head screwdriver, a 10mm socket wrench, and a 4mm Allen wrench. You may also need a pair of needle nose pliers and a pair of wire cutters.
What are the steps for removing the fairing from a Street Glide?
The steps for removing the fairing from a Street Glide vary slightly depending on the model year, but in general, you will need to remove the screws on the side of the fairing, disconnect the electrical connections, and then remove the bolts from the top of the fairing. Once the bolts are removed, the fairing can be lifted off the bike.
What should I do if the fairing does not come off easily?
If the fairing does not come off easily, you may need to adjust the mounting bolts or remove additional screws or bolts. You can also use a lever to gently pry the fairing off the bike. If the fairing is still stuck, you may have to consult a professional mechanic to help you remove the fairing.


