Are you a Harley-Davidson owner looking to learn more about maintaining your Stage 2 air cleaner?
Maintain a Stage 2 air cleaner by cleaning it every 5,000 miles or as needed, depending on riding conditions. Use a specialized cleaner and oil for reusable filters to maintain airflow and filtration efficiency.
In this article, you’ll find simple steps to keep your air cleaner running optimally. From cleaning and oiling your filter, to replacing parts, we’ll cover everything you need to know about maintaining a Stage 2 air cleaner. So, read on to ensure your air cleaner is running in tip-top shape!
What is a Stage 2 Air Cleaner?
For many motorcycle enthusiasts, Harley-Davidson is a brand that represents the epitome of the American dream on two wheels. These iconic motorcycles are known for their powerful engines, distinctive design, and a roaring exhaust note that is music to any rider’s ears. To further improve the performance of these bikes, many Harley-Davidson riders go for aftermarkets, one of which is the Stage 2 Air Cleaner.
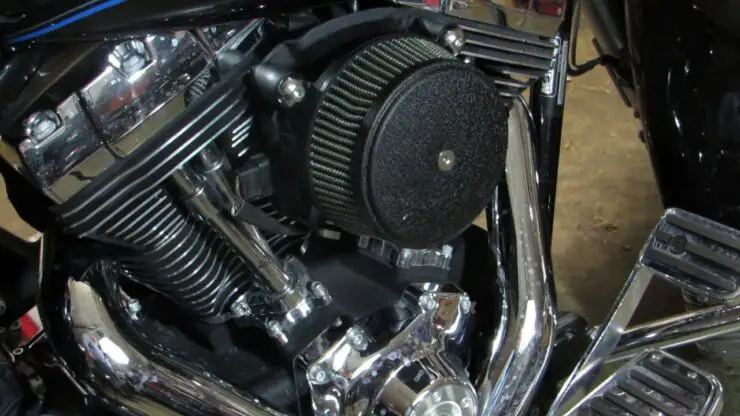
A Stage 2 Air Cleaner is essentially an aftermarket air intake system designed for replacing the stock air cleaner assembly on a Harley-Davidson bike. This upgrade is part of a multi-stage process to enhance the bike’s performance and improve its air intake capabilities. While Stage 1 largely involves adding a high-flow exhaust system and a remap of the motorcycle’s Electronic Control Unit (ECU), Stage 2 Air Cleaner upgrade focuses on the air intake side of things.
Installing a Stage 2 Air Cleaner typically needs some mechanical aptitude but it can only be carried out by experienced riders or with the help of a professional motorcycle mechanic. It is important to consider the compatibility of the air cleaner with your specific Harley-Davidson bike’s model and whether additional modifications are needed for optimizing performance and maintain reliability.
Benefits of installing a Stage 2 Air Cleaner
Harley-Davidson bikes are renowned for their distinctive style, powerful engines, and the deep, thunderous rumble that echoes from their exhausts. Riders truly cherish the feeling of freedom and exhilaration that comes with each twist of the throttle. For riders looking to enhance their Harley-Davidson bike’s performance and enjoy more power, a Stage 2 Air Cleaner will be a popular modification. A Stage 2 Air Cleaner comes with a long list of exciting benefits such as increased horsepower, louder sound, and more. Here are some of the benefits of a Stage 2 Air Cleaner for Harley-Davidson motorcycles.
#1. Increased horsepower and torque
One of the most compelling benefits of a Stage 2 Air Cleaner is the significant increase in horsepower and torque it can offer. By replacing the stock air cleaner, which is designed with restrictions to meet emissions and noise regulations, with a high-flow Stage 2 Air Cleaner, more air can enter the engine. This improved airflow results in increased power output. Riders can experience a substantial boost in acceleration and overall performance.
#2. Better fuel efficiency
While it might seem counterintuitive, a Stage 2 Air Cleaner can result in improved fuel efficiency. When the engine receives a more optimal air-fuel mixture, it burns fuel more efficiently. This can result in better gas mileage, making the rides more economical in the long run.
#3. Enhanced throttle response
A Stage 2 Air Cleaner enhances throttle response, making your bike more responsive to your inputs. When you twist the throttle, the engine will react more promptly, delivering immediate power. This responsiveness is noticeable at low RPMs and during quick acceleration, giving you better control over your motorcycle.
#4. Improved sound and character
Harley-Davidson bikes are known for their distinctive exhaust notes and a Stage 2 Air Cleaner will enhance the signature sound. With improved airflow and combustion, the engine will often produce a deeper and more resonant exhaust note. Many riders appreciate the enhanced auditory response as it adds to the overall character and allure of their bike.
#5. Customization and style
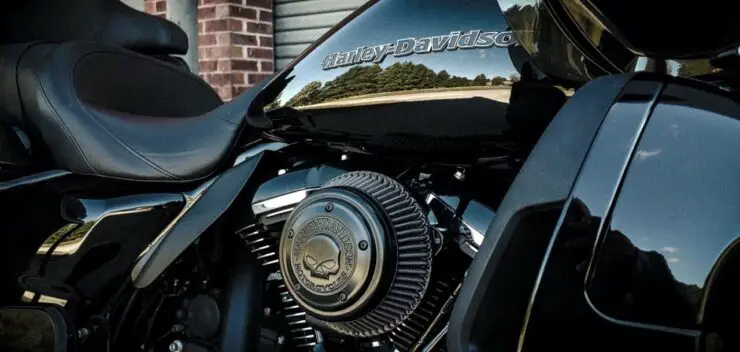
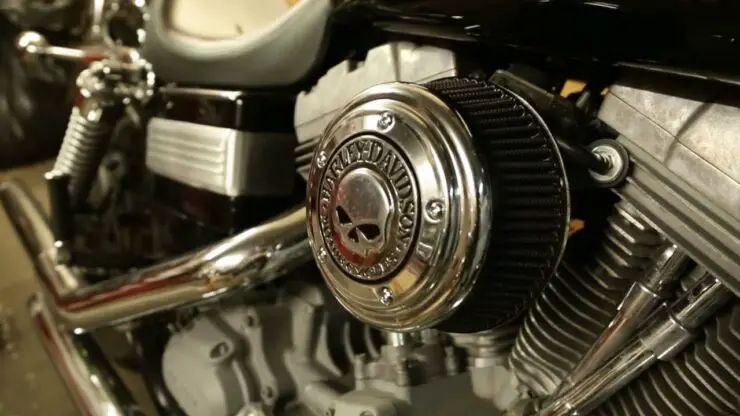
A Stage 2 Air Cleaner is not just about performance but it is also an opportunity to customize your motorcycle’s appearance. Aftermarket air cleaner covers and designs come in a wide variety of styles, allowing you to tailor your motorcycle’s aesthetics to your needs and preferences. Whether you prefer a classic look or something more unique, there are options available to suit every taste.
#6. Ideal for other performance upgrades
A Stage 2 Air Cleaner is typically a part of a broader performance upgrade package. When combined with a high-flow exhaust system and proper tuning, it can result in greater benefits. These upgrades work together and create a well-balanced and optimized performance package for your Harley-Davidson bike.

Preparation for maintaining a Stage 2 Air Cleaner on a Harley-Davidson bike
Maintaining a Stage 2 Air Cleaner on your Harley-Davidson motorcycle is important for optimal performance. The air cleaner is responsible for offering clean and filtered air to your engine, ensuring efficient combustion and maximum power. Regular maintenance is important to keep the air cleaner in top shape. Here are the tools and supplies you’ll need to gather and other things to check off your checklist before maintenance of a Stage 2 Air Cleaner.
Before diving deep into the cleaning process, it is important to perform a pre-cleaning checklist to ensure you have everything you need and that the task goes smoothly.
#1. Safety first
First, you should make sure that your bike is parked on a level surface. Moreover, you should wear appropriate safety gear, including safety glasses and safety gloves to protect yourself from dirt and debris.
#2. Gather cleaning supplies
Make sure that you have all the necessary cleaning supplies ready including –
- A Stage 2 Air Cleaner cleaning kit designed specifically for your air cleaner model
- A clean and dry workspace having good lighting
- A bucket or container for soaking the air filter element
- A soft-bristle brush on air filter cleaning brush
- Mild dish soap or air filter cleaning solution
- A clean, lint-free cloth or paper towels
- Compressed air or air compressor
- A drip tray or absorbent mat to catch any excess cleaning solution or oil
- A replacement filter element
#3. Review the motorcycle manual
Refer to your Harley-Davidson motorcycle manual or the manufacturer’s instructions for specific guidelines on removing and cleaning the Stage 2 Air Cleaner. Different models might have variations in the process.
#4. Plan adequate time
Cleaning the air cleaner might take a bit of time. You should make sure that you have enough time for completing the task without rushing.
#5. Essential tools
To effectively clean a Stage 2 Air Cleaner, you will require a set of essential tools to help you through the maintenance process –
- Screwdrivers – Depending on the air cleaner’s design, you might need screwdrivers for removing the cover or housing that encloses the air filter element
- Pliers – Pliers can be handy for loosening hose clamps or securing elements in place
- Soft-bristle brush or cleaning brush – Use a soft-bristle brush or an air filter cleaning brush for gently removing loose dirt and debris from the air filter element
- Compressed air or air compressor – Compressed air helps in removing stubborn dust and debris from the filter, ensuring you have an air source ready
- Cleaning solution or mild dish soap – Arrange a suitable air filter cleaning solution or mild dish soap mixed with water for cleaning the air filter element
- Replacement filter element – If your air filter element is damaged or excessively dirty, it’ll be a smart idea to have a replacement filter element on hand
How to clean a Stage 2 Air Cleaner for Harley-Davidson bikes?
Maintaining a Stage 2 Air Cleaner on your Harley-Davidson bike is important to ensure that your motorcycle continues running at peak performance. Cleaning the air filter element will not only improve airflow but also extend the life of your air cleaner. Knowing the right way to clean a Stage 2 Air Cleaner will make your job a whole lot easier. Here are the steps you need to follow for cleaning a Stage 2 Air Cleaner and make sure the upgrade lasts for years to come.
Step 1: Remove the old filter
Start off by locating the Stage 2 Air Cleaner on your Harley-Davidson bike. Refer to your bike’s owner’s manual for specific instructions on accessing the air cleaner as the process might vary between models. Make use of a screwdriver or pliers for loosening and removing any clamps, bolts, or fasteners securing the air cleaner cover or housing in place.
You should then carefully lift the air cleaner cover or housing to reveal the old filter element. Be gentle to avoid damaging any components. Remove the old filter element from its housing. Take note of how it is positioned to ensure proper reassembly.
Step 2: Clean the filter housing
Once the old filter is removed, inspect the filter housing for any dirt, debris, or dust that might have accumulated. Use a soft-bristle brush or an air filter cleaning brush for gently removing loose dirt and debris from the housing. Make sure that you clean all surfaces thoroughly.
Once loose debris has been removed, use compressed air or an air compressor to blow out any remaining dust or particles from the housing. This step will be important to ensure a clean and debris-free environment for the new filter.
Step 3: Apply oil treatment
Prepare a mixture of mild dish soap or air filter cleaning solution and water in a bucket or container. Follow the manufacturer’s recommended dilution ratio for the cleaning solution. Then, submerge the new or cleaned filter element into the cleaning solution, ensuring it is fully saturated.
Now, gently squeeze and massage the filter to distribute the cleaning solution and loosen any trapped dirt or contaminants. Allow the filter to soak for the recommended time specified by the cleaning solution manufacturer.
After soaking, rinse the filter thoroughly with clean water for removing all traces of the cleaning solution. Make sure that the filter is completely clean and free from any soap residue. Once cleaned, you should allow the filter to air dry completely. Remember not to use compressed air or heat sources for speeding up the drying process as excessive heat could damage the filter.
Step 4: Reassemble and test
Place the clean and dry filter element back into the filter housing, making sure it is properly positioned. Then, carefully reattach the air cleaner cover or housing, securing it in place with bolts, clamps, or fasteners.
Double-check to make sure all connections are tight and secure. Then, start your Harley-Davidson bike and let it run for a few minutes to make sure that the air cleaner is functioning correctly.

How to replace a damaged Stage 2 Air Cleaner?
If you own a Harley-Davidson bike and have installed a Stage 2 Air Cleaner to boost its performance and unleash its full potential, you will know the importance of maintenance. However, sometimes maintenance is not enough and you will have no option but to replace it with a new one. This is why you will need to install a new Stage 2 Air Cleaner on your Harley-Davidson bike if you want to enjoy increased airflow to the engine, improved power, better throttle response, and more. Here are the steps you need to follow for installing a new Stage 2 Air Cleaner on your Harley-Davidson motorcycle.
Step 1: Preparation and safety
Safety is important when working on your Harley-Davidson motorcycle. This is why before you start, you should take the following safety precautions –
- Park your bike on a flat and stable surface
- Make sure that the engine is cool to the touch
- Disconnect the battery for preventing any electrical mishaps
- Wear gloves and safety glasses to protect yourself from dirt and debris
Step 2: Locate and access the air cleaner
The location of the air cleaner on your Harley-Davidson bike might vary depending on the model but it is typically located near the engine. Consult your Harley-Davidson bike’s owner’s manual for specific instructions on accessing the air cleaner.
Step 3: Remove the old air cleaner
Use a screwdriver or pliers for loosening and removing any clamps, bolts, or fasteners that are securing the old air cleaner cover or housing. Then, you should lift the old air cleaner cover or housing to reveal the old filter element. After that, remove the old air filter element from its housing. Take note of how it is positioned to ensure proper reassembly.
Step 4: Install the new air filter
Take the new Stage 2 Air Cleaner kit and make sure that it includes all the necessary components like the new air filter element and cover or housing. Then, you should carefully place the new filter element into the housing, ensuring that it is properly positioned. Then, carefully secure the new air cleaner cover or housing in place by tightening the clamps, bolts, or fasteners. Make sure that all collections are tight and secure. Once the new air filter has been installed, you need to reconnect the battery to restore electrical power.
Step 5: Check for leaks
Start your Harley-Davidson bike and let it run for a few minutes. This will allow you to check for any potential air leaks around the air filter housing. Listen for any unusual sounds or hissing noises that may indicate air escaping from the housing. Use a flashlight if needed to inspect the housing closely for any visible leaks.
If you detect any leaks, you should stop the engine and carefully examine the housing cover’s seal and connections. Then, tighten any fasteners if needed and ensure that the cover is properly seated.
Inspect the entire installation to ensure that all components are securely in place, including the filter, housing cover, and battery connections.
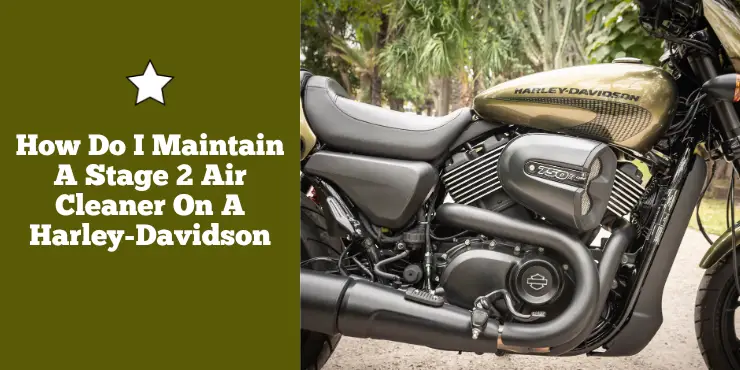
How do I maintain a Stage 2 Air Cleaner on a Harley-Davidson?
Owning a Harley-Davidson bike is a thrilling experience but it also comes with the responsibility of proper maintenance. With the addition of modifications like a Stage 2 Air Cleaner, you will have a further hassle of having to maintain the Stage 2 Air Cleaner too. This begs the question, how do I maintain a Stage 2 Air Cleaner on a Harley-Davidson?
If you know how to maintain the Stage 2 Air Cleaner, you will be able to keep your bike running smoothly and roaring down the open road. Here are the habits you need to develop to maintain the Stage 2 Air Cleaner on your Harley-Davidson bike to extend the life of your bike and its components and get peak performance.

#1. Regular inspection
Routine inspection is the foundation of proper maintenance. Make it a habit to visually inspect your Stage 2 Air Cleaner and the surrounding components regularly. Look for signs of dirt, debris, and damage. Pay close attention to any visible leaks or loose connections. A quick visual check can help you catch issues before they become major problems.
#2. Cleaning and replacement
Cleaning the Stage 2 Air Cleaner is important to maintain airflow and performance. You must follow the manufacturer’s recommendations for cleaning intervals, which might vary based on your riding conditions. Typically, a Stage 2 Air Cleaner can be cleaned using a suitable air filter cleaning solution or mild dish soap and water. Gently massage the cleaning solution into the filter, rinse thoroughly, and then allow it to air dry completely before reinstallation.
While cleaning is important, air filters have a limited lifespan and there will come a time when a replacement is needed. You should regularly check the condition of the filter element. If it is excessively dirty, damaged, or worn, it will be time for a replacement. You must consult your bike’s manual or the filter manufacturer’s guidelines for recommended replacement intervals.
#3. Tighten fasteners
Harley-Davidson bikes are known for their vibration, which can cause fasteners to loosen over time. You should periodically inspect and tighten the clamps, bolts, or fasteners, securing the air cleaner housing and cover. Loose connections can result in air leaks, compromising engine performance.
#4. Ensure proper sealing
When reinstalling the air cleaner housing and cover, you should make sure they are properly sealed. Any gaps or improperly seated components can allow unfiltered air to enter the engine, potentially resulting in damage. Double-check the seal to maintain an airtight environment.
#5. Be mindful of riding conditions
Your riding conditions can impact the maintenance needs of your Stage 2 Air Cleaner. If you frequently ride in dusty or dirty environments, you might have to clean or replace the filter more often. Similarly, if you encounter heavy rain or wet conditions, you must inspect the air cleaner for any signs of water intrusion.
#6. Professional inspection
While DIY maintenance is important, it is advised that you should schedule regular professional inspections and tune-ups with a certified Harley-Davidson mechanic. They can perform more in-depth checks, assess the overall condition of your motorcycle, and ensure that your Stage 2 Air Cleaner is functioning at its best.
FAQs
What is the purpose of a stage 2 air cleaner on a Harley-Davidson?
A stage 2 air cleaner on a Harley-Davidson is designed to increase air flow and provide increased airflow to the engine, resulting in improved performance. The air cleaner also helps to improve the sound of the engine by reducing backpressure.
How often should I clean and maintain the stage 2 air cleaner on my Harley-Davidson?
The stage 2 air cleaner on a Harley-Davidson should be cleaned and serviced every 6,000 miles or once a year, whichever comes first. This will help to ensure that the air cleaner is functioning properly and that the engine is receiving the correct amount of air flow.
Q: What should I use to clean and maintain the stage 2 air cleaner on my Harley-Davidson?
To clean and maintain the stage 2 air cleaner on your Harley-Davidson, you should use a high quality air filter cleaner and a soft brush. You should also use a shop vac to remove any dust or debris that may be present in the air cleaner. You should also replace the air filter element every 12,000 miles or once a year, whichever comes first.
>>> Read more about Stage 2 Air Cleaner for Harley-Davidson <<<

