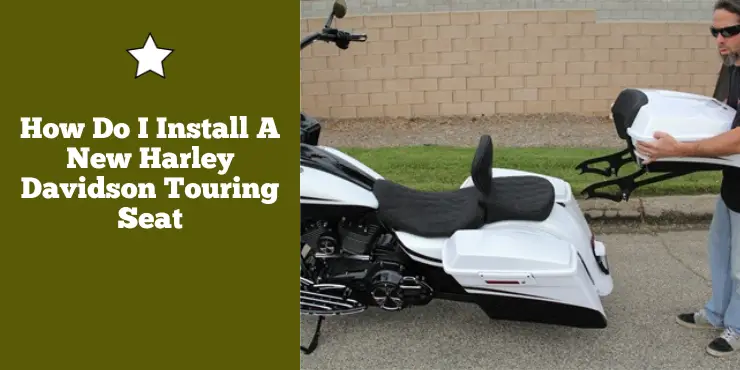
Are you looking to upgrade your Harley-Davidson Touring Seat with a new and improved version? Installing a new seat can be intimidating, but with some simple tools and a bit of patience, you can give your bike a whole new look.
To install a new Harley touring seat, align the seat’s mounting points with the bike frame, insert and tighten the mounting bolts, ensuring a secure fit without shifting.
In this article we will walk you through the process of installing a new seat, from the tools and materials you’ll need to the different steps involved. Read on to learn more and get your bike ready for the road!
Tools needed for installing a Harley-Davidson Touring Seat
Installing a new seat on your Harley-Davidson bike can greatly enhance your comfort, style, and overall riding experience. Whether you are upgrading the seat for aesthetics or looking for better support during long rides, the installation will require the right tools for ensuring a smooth and successful process. Here are some of the important tools you will need to have on hand for installing a new Touring Seat on your Harley-Davidson bike.
>>> Click here to read our review of the Best Harley-Davidson Touring Seat <<<
#1. Socket and wrench set
A comprehensive socket and wrench set are considered to be the backbone of any motorcycle installation project. Make sure that you have a wide variety of sizes to fit different bolts and fasteners on your Harley-Davidson bike. A socket and wrench set will be important for removing the stock seat and securing the new one in place.
#2. Allen wrench set
Harley-Davidson bikes often use Allen bolts for different components, including the seat bracket. An Allen wrench set will allow you to remove and replace these bolts without any issues.
#3. Torque wrench
Properly torquing the bolts and fasteners is important to ensure the safety and stability of your new seat installation. A torque wrench will allow you to tighten bolts to the manufacturer’s specifications, preventing overtightening or undertightening.
#4. Screwdrivers
Having a set of high-quality Phillips and Flathead screwdrivers will come in handy for different aspects of seat installation, such as removing brackets, clips, or panels that may be getting in the way.

#5. Pliers
Pliers are extremely versatile tools that can help with gripping and maneuvering various components during the installation process. Needle-nose pliers are especially useful for reaching tight spaces.
#6. Threadlocker
To prevent vibrations from causing nuts and bolts to loosen over time, you should consider using threadlocker or locktite. This adhesive will ensure that the fasteners remain secure and prevent any unexpected issues on the road.
Preparation before installing a Harley-Davidson Touring Seat
Installing a new touring seat on your Harley-Davidson bike involves more than just swapping around parts. It will require careful planning, gathering specific tools, and carrying out proper preparation. The better you are prepared, the easier it will be to carry out the installation. Here are the preparatory steps you will need to carry out before you can install a new touring seat on your Harley-Davidson bike.
Choose the right seat
Selecting the right touring seat for your Harley-Davidson Touring bike is paramount to a comfortable and enjoyable riding experience. You need to consider different factors like riding style, material, cushioning, and more when making your choice.
The first thing you should consider is your riding style. Are you a tourer, a cruiser, or an urban rider? Different seat styles cater to different riding preferences, offering the needed comfort and support. You must look for a touring seat that offers the appropriate level of cushioning and support that suits your body type and riding posture.
Choose the seat material that aligns with your desired look and feel. Leather, synthetic materials, and different stitching patterns contribute to the overall aesthetic. Ergonomically designed seats will improve comfort by providing proper lumbar support and weight distribution, which can greatly enhance your riding experience.
Familiarize yourself with the installation process
Before you dive into the installation process, you must take time to familiarize yourself with your bike’s make and model. Review your bike’s owner’s manual and any relevant guides for understanding the specific steps and requirements for your bike. Each Harley-Davidson model comes with its unique considerations when it comes to seat installation.
Arrange a clear workspace
Before you begin, you should clear a workspace where you can work on your bike. Make sure that you have adequate lighting and a safe environment. You shouldn’t forget to wear appropriate safety gear, including gloves and safety glasses for protecting yourself during the installation process.
Park your bike on a level surface and make sure it is securely supported using a motorcycle stand or lift. This will prevent any accidental movement during the installation process.
How do I install a Harley-Davidson Touring Seat?
Upgrading your Harley-Davidson bike with a new touring seat can greatly transform your riding experience, offering enhanced comfort and style. Changing the seat on your Harley-Davidson bike is a rather straightforward process. Once you have the right tools and carried out the preparation, you can easily remove the stock seat and install a new touring seat. If you are wondering how do I install a Harley-Davidson Touring Seat, then you shouldn’t worry as it is easier than you think. Here are the steps you will need to follow for installing a Harley-Davidson Touring Seat.
Step 1: Remove the old seat
For removing the old seat from your Harley-Davidson Touring bike. You will need to locate and remove bolts before lifting and removing the seat. The first step would be identifying and removing the bolts that are securing the seat to your bike’s frame.
Carefully inspect your bike’s frame to locate the mounting points of the seat. Typically, there are two bolts that secure the seat to the frame – one at the rear and the other at the front. You must park your bike on a level surface and make sure it is stable. Make use of a motorcycle stand or lift for keeping your bike secure while you work.
Using the appropriate tools, you must gently loosen the bolts that secure the seat to the frame. Turn the bolts counterclockwise for removing them. Keep the bolts in a safe place as you will need them when you install the new seat.
Once the bolts have been removed, it’ll be time to carefully lift and remove the old seat from your Harley-Davidson Touring bike. Make sure that you are gentle when lifting the seat from the rear end, gradually tilting it upward. Be cautious that you do not end up straining your back or damaging any components as you’re lifting.
When you lift the seat, make sure that it clears the mounting points on the frame. Look out for any wiring or clips that may be attached to the seat and carefully detach them if needed. Once the seat is lifted completely, you should carefully set it aside in a safe and clean area. You may want to keep it for reference or as a backup for the future.
Step 2: Install the new seat
Properly positioning the new seat on your Harley-Davidson bike is important for ensuring a comfortable and secure fit. You must carefully position the new seat over the bike’s frame, aligning the mounting holes on the seat with the corresponding holes on the frame. Take your time to make sure you get proper alignment.
Sit on your bike and assess the positioning of the new seat. Make any necessary adjustments for ensuring that you are comfortable and that the new touring seat does not interfere with any nearby components.
Once the new seat has been positioned correctly, the next step would be to attach it securely to the bike’s frame. Insert the bolts or fasteners through the mounting holes on the seat and into the corresponding holes on the frame. Hand-tighten the bolts initially for ensuring proper alignment before proceeding.
Utilize a torque wrench for tightening the bolts to the manufacturer’s recommended torque specifications. This step will be important for preventing overtightening or undertightening, ensuring you get a secure fit without damaging the frame or seat. Confirm that the new seat does not impede any nearby components, wiring, or moving parts. Adjust the seat’s position if needed for providing adequate clearance.
Utilize a torque wrench for tightening the bolts to the manufacturer’s recommended torque specifications. This step will be important for preventing overtightening or undertightening, ensuring you get a secure fit without damaging the frame or seat.
Confirm that the new seat does not impede any nearby components, wiring, or moving parts. Adjust the seat’s position if needed for providing adequate clearance. If any clips, brackets, or wiring were detached during the old seat removal process, you should ensure that you reattach them securely to the new seat. This step will ensure that all components are properly fastened and functioning properly.
Step 3: Ensure proper attachment
Once you have installed the new seat, you will need to properly tighten the bolts and ensure a secure attachment. Make use of a torque wrench for tightening the bolts as per the manufacturer’s recommended torque specifications. This step will help you prevent overtightening or undertightening, which can greatly impact the stability and safety of your seat.
When tightening the bolts, you must follow a cross-pattern sequence. Begin with one bolt and move diagonally to the opposite bolt and then repeat the process for the remaining bolts. This technique will ensure even pressure distribution.
You should make sure that the new seat does not interfere with nearby components, wiring, or moving parts as it’ll be important for safe and comfortable riding. You must inspect the area around the seat for any signs of interference or contact with components such as gas tanks, fenders, or frame parts.
If you identify any clearance issues, carefully adjust the seat’s position to eliminate contact with nearby components. This step will prevent potential damage and maintain the integrity of your bike. Confirming that all clips, brackets, and wiring are reattached properly after seat installation will ensure that your bike’s components are secure.
If any brackets, clips, or wiring were removed during the seat installation process, you must ensure that they are properly reattached to the new seat. This step will ensure that all components are fastened securely. Check that any reattached components fit snugly and securely, without any signs of looseness or instability. This step will help prevent any issues when riding.
Before you hit the road, you should take the time to test your new seat’s stability and comfort to ensure you get a safe and enjoyable ride. To do that, you need to sit on your Harley-Davidson bike and pay close attention to how the seat feels. Make sure that the seat provides the desired level of comfort, support, and stability.
Shift your weight on the seat and move around slightly for gauging its stability and comfort when riding. Confirm that the seat remains securely attached when shifting your weight and moving. Any signs of instability must be addressed before embarking on a ride.

Care and maintenance of the Harley-Davidson Touring Seat
Once you have installed a new touring seat on your Harley-Davidson bike, your riding experience will receive a significant upgrade in terms of style, comfort, and safety. To make sure that your investment continues to provide optimal comfort and durability, regular care and maintenance will be important. Here are some of the steps to follow for taking care of your touring seat and proper maintenance. By following these steps, you will be able to prolong the life of your new touring seat and enjoy a consistently enjoyable ride.
Regular cleaning
Keeping the new touring seat on your Harley-Davidson bike will not only maintain its appearance but also contribute to your overall comfort during rides. You must collect appropriate cleaning supplies, including a soft cloth, mild soap, and water. Avoid using any harsh chemicals or abrasive materials that may end up damaging the seat’s finish.
Make use of a damp cloth and mild soap solution for gently wiping down the seat’s surface. Pay close attention to removing any dust, dirt, and residue that might accumulate over time.
After thorough cleaning, you should make sure that you dry the seat properly using a clean, dry cloth. Make sure that there is no moisture remaining as it could potentially affect the touring seat’s material.
Adjust the seat for maximum comfort
While the new touring seat you have installed is already revived for comfort, slight adjustments may be needed to tailor it to your unique preferences. To do that, you need to sit on your bike, experiment with positioning, and evaluate lumbar support.
Sit on your bike and assess your comfort level. Pay close attention to your posture and any pressure points. You should gently adjust your seat’s positioning by moving forward, backward, or side-to-side. Make minute changes and evaluate the impact on your comfort levels.
Check if the seat offers adequate lumbar support. Adjustments to the seat’s position will enhance your lower back’s comfort during rides.
Maintain proper riding position
Maintaining a proper riding position will not only ensure your comfort levels but also contribute to your safety on the road. You must make sure that the handlebars and controls are appropriately adjusted to complement your seating position. This will ensure you get a harmonious alignment between your upper body and the seat.
Sit on your bike with your back straight and your feet firmly on the footpegs. Maintain a relaxed posture that allows you to control the motorcycle effectively. You must periodically assess your riding position during rides. If you notice any discomfort or strain, you should make minor adjustments to your body posture or the seat’s position.
Indicators that it is time to install a new Harley-Davidson Touring Seat
Your Harley-Davidson bike is a reflection of your style and passion for the open road. It has everything one might want from an expensive investment. One of the most important aspects of an enjoyable and comfortable ride is the seat. Over time, wear and tear can affect the condition and comfort levels of your seat, resulting in discomfort during your journeys. Here are some of the indicators that point out it is time to install a new Harley-Davidson Touring Seat, ensuring that you can continue to ride in style and comfort.

Visible wear and tear
The first and most obvious sign that your Harley-Davidson seat requires replacement is visible wear and tear. Cracks, fading, rips, or other forms of damage to the seat’s surface can compromise both its aesthetics and structural integrity. If the leather or upholstery is deteriorating, it is a clear indication that a new touring seat is required.
Lack of comfort
As you spend a lot of time on the road, comfort will be paramount. If you find yourself constantly shifting to find a comfortable position or experiencing discomfort even on short rides, your seat may be to blame. Foam padding could lose its resilience over time, resulting in decreased support and cushioning.
Numbness and tingling
Numbness and tingling sensation in your legs, thighs, or buttocks can be an indication of an ill-fitting seat that doesn’t provide enough support. A seat that doesn’t distribute the weight evenly can result in pressure points, causing discomfort and even circulation issues during longer rides.
Back pain
A seat that does not provide ample lumbar support can contribute to back pain during and after rides. If you’re consistently experiencing lower back discomfort after riding, it might be time to install a new touring seat that offers better ergonomic support.
Vibrations and bumps are excessively felt
While some level of vibration is expected when riding, excessive vibrations or feeling every bump on the road can be a sign that the current seat isn’t absorbing shocks effectively. Upgrading to a new touring seat with enhanced shock-absorbing properties can improve your overall riding experience.
Sliding forward and backward
If you’re finding yourself constantly sliding forward or backward on the seat, you aren’t getting the stability and grip you require. This can be dangerous and distracting while riding, so you should consider a seat with better contouring and anti-slip features.
Noticeable loss of height
A seat that has compressed significantly over time may result in a noticeable loss of height. This can affect your posture, comfort, and your ability to control the motorcycle properly.
Customization and style preferences
Sometimes, the desire for a fresh look or a personalized style may be the reason to install a new touring seat. Customizing your Harley-Davidson bike includes selecting a seat that aligns with your aesthetic preferences and complements the overall appearance of your Harley-Davidson motorcycle.
FAQs
What tools do I need to install a new Harley-Davidson Touring seat?
To install a new Harley-Davidson Touring seat, you will need a few basic tools, such as a socket wrench set, screwdriver, and pliers. You may also need an adjustable wrench and a rubber mallet or hammer to remove the old seat and install the new one.
What are the steps for installing a new Harley-Davidson Touring seat?
The steps for installing a new Harley-Davidson Touring seat include removing the old seat, disconnecting the wiring, securing the new seat to the frame, and connecting the wiring. You should also make sure to properly secure any bolts and check the tightness of the screws before you ride.
What are some tips for installing a new Harley-Davidson Touring seat?
It’s important to take your time when installing a new Harley-Davidson Touring seat. Make sure to read the installation instructions thoroughly, and check for any loose screws or bolts. It may also be helpful to use a lubricant to help make the installation process easier. Additionally, you should check the tightness of the screws and bolts after the installation is complete for optimal safety.
>>> Read more about Harley-Davidson Touring Seats <<<

